Monday, March 9, 2015
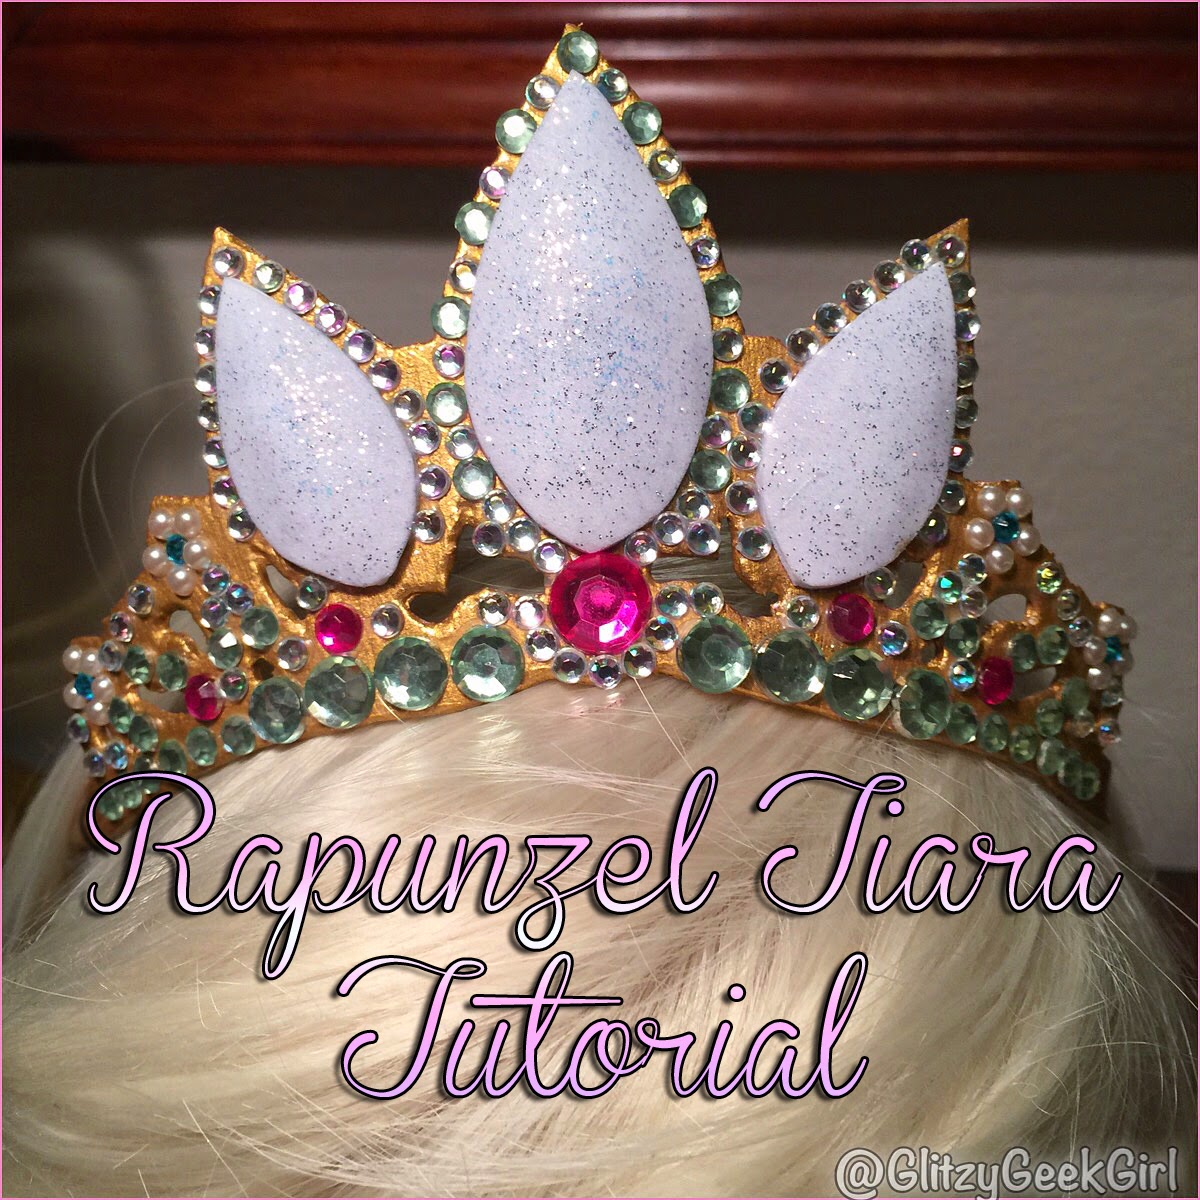
Tutorial: Rapunzel Tiara
I’ve got a dream! I’ve got a dream!
It’s to be a princess, of course! I had been looking for an affordable Rapunzel crown for quite some time but sadly could only find child sizes. So one night I decided to make the crown myself with whatever materials I had laying around.
And to help other lost princesses I decided to make a tutorial so you can become royalty as well!
Rapunzel’s tiara is beautiful! But where do you start? Well, the first thing I did was find some good reference shots from the movie. While I was searching I found this helpful template on the official Disney Family website.
I printed out their template and taped it to a sheet of craft foam. Then, on a cutting board, I carefully cut the shape of the crown out with an X-Acto knife. After I had my base shape I played around with the template and the jewels to figure out how I would add “bling” my tiara.
To prep the base of the crown I painted it with two coats of primer called Gesso. This will stiffen the foam for added stability and also make the paint go on easier. Then I painted two coats of gold acrylic paint and sealed it with a satin clear finish.
Since I didn’t have any large teardrop shaped jewels on hand, I decided to make some out of foam. All I did was cut out the jewels from the left over template and trace them onto a sheet of white foam. Then I used my clear satin finish to give the jewels shine and sprinkled some silver glitter onto them. I added a tiny bit of a cotton ball underneath each of the three jewels to give them a beveled look and hot glued them onto the gold base.
The rest of the jewels are just acrylic gems I had in my craft room. I used some tweezers and Tacky glue to hand place each gem. I tried to get the look as close to the original as I could, but you can use your creative freedom here to decorate your tiara any way you’d like.
To wear the crown, I attached two metal hair combs. These can be purchased at most craft stores.
Just spread some hot glue on the back of your tiara. Then lay the comb on the glue and gently press it down. I also added a thin layer of glue on top to sandwich the comb in.
That’s it! All done!
This project was very easy and also fun to do! I would love to make another one with different types of jewels and colors someday. It took a little time to individually glue down each jewel, but if you turn on some Disney tunes or watch Tangled while you make it you’ll be done before you know it.
I would love to cosplay as Rapunzel someday!
Even if I don’t make her full costume, I still love having this tiara on display in my room. It’s so light weight it could be worn as part of a Disney Bounding outfit, too! Maybe next time I visit Walt Disney World I will bring it along.
:+:+:+:+:
Which Disney princess tiara is your favorite?
If you use my tutorial to make a Rapunzel Tiara be sure to send me pics!
Subscribe to: Post Comments (Atom)


You did a fantastic job! How awesome that Disney had a template to use!
ReplyDelete
This comment has been removed by the author.
ReplyDelete
You did a great job! It's looks lovely ♥
decapitateddreams.blogspot.com
ReplyDelete
This is absolutely lovely. I'm in awe of what you pull off with craft foam!
www.thegeekyseamstress.com
ReplyDelete
Love love and love thanks for sharing 🙂
ReplyDelete
So cute! I really need to starting playing with craft foam!
ReplyDelete
Sooo cute!
I like your tutorials! They're so helpful!
ReplyDelete
This is too cute!! I should do this with my munchkin cousin.
ReplyDelete
Omg! This is such a cute idea! I really have to try this out. I was looking for a crown on ebay a few days ago but this idea is much better and cheaper.
Blue Books and Butterflies
ReplyDelete