Tuesday, April 22, 2014
Tutorial: Jessie from Toy Story Cosplay
YEEEEE HAAAAW!!
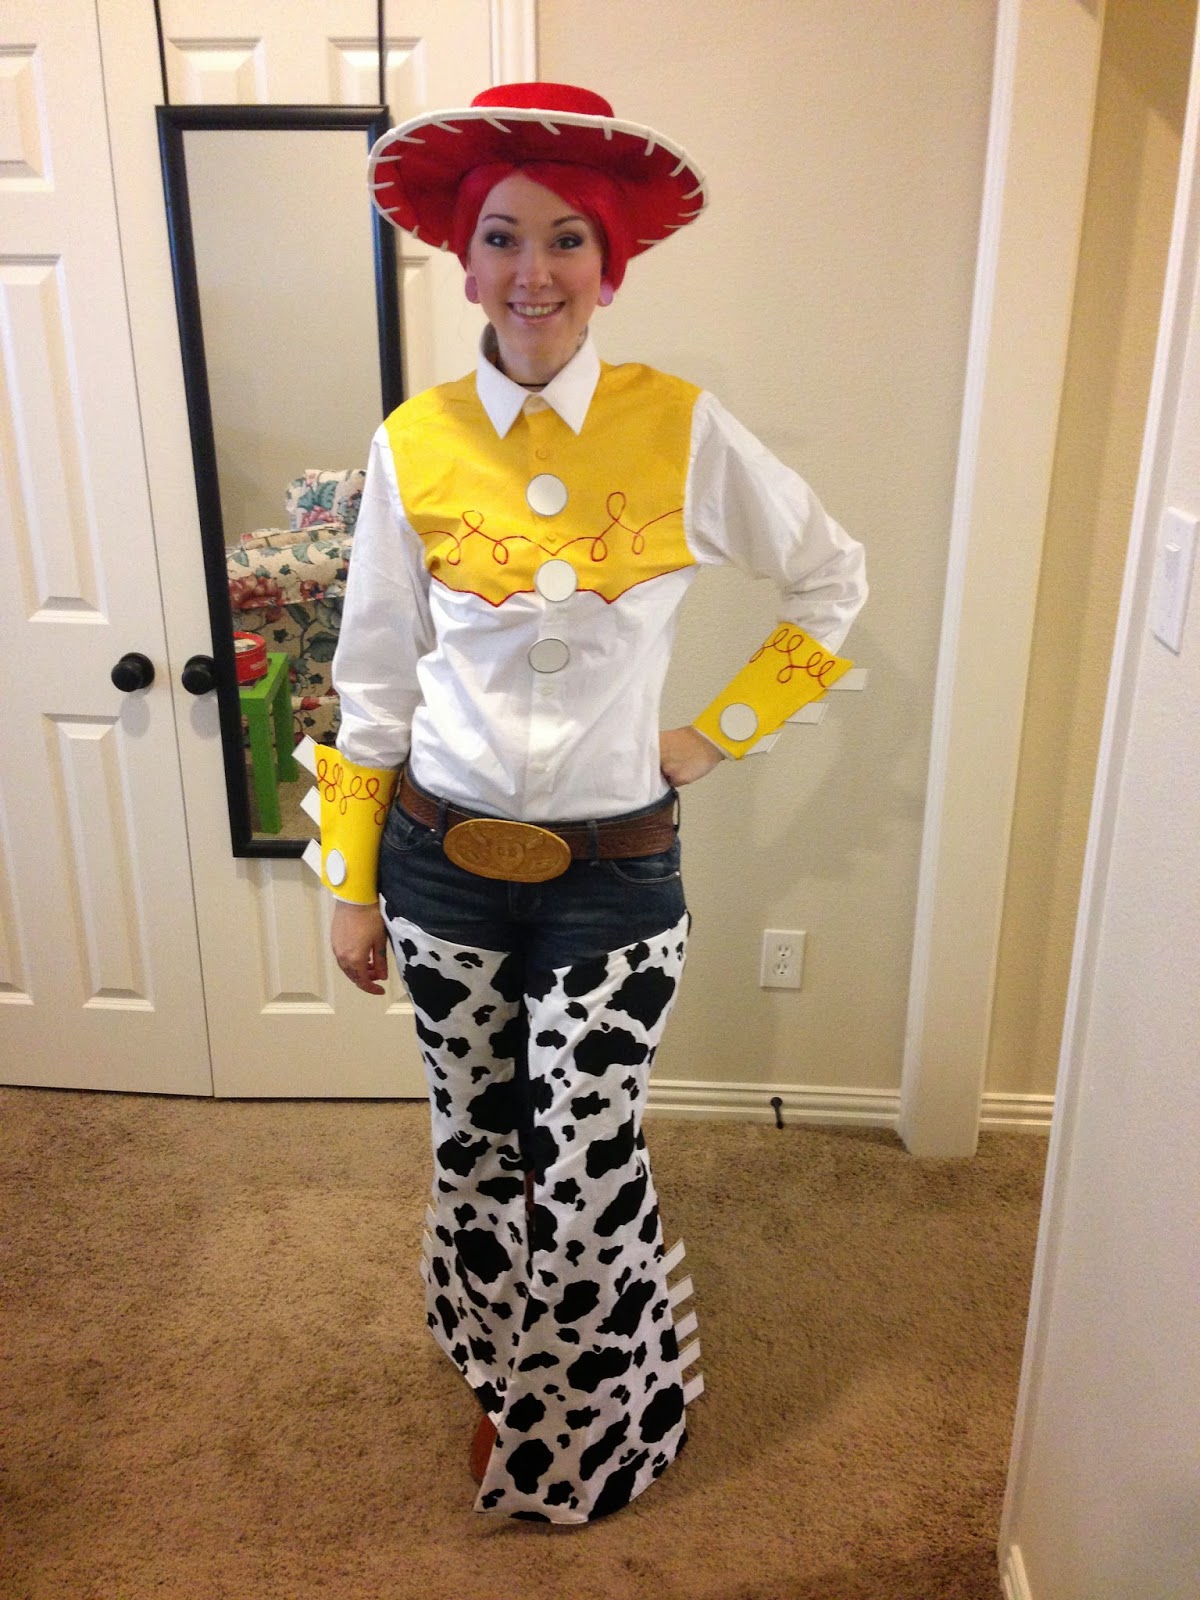
I’m super excited to share with y’all a root tootin’ fun cosplay! It’s Jessie from Toy Story! I was inspired to make this costume after my friend Garrett mentioned he wanted to build a Buzz Lightyear cosplay. Jessie had been on my dream list, and I think she looks best when paired with other Toy Story characters. So Garrett and I chatted about it and we both got to working on our costumes! I was so happy with how they turned out. Garrett looked amazing as Buzz! Also, huge thank you to Neither Noir for taking this photo of us. If you’d like to view all of my photos from All-Con then check out my Facebook Album.
Now onto the tutorial!
This was the reference photo I used for most of Jessie’s outfit. It is a very fun and easy costume to make. I would definitely recommend it for any first time cosplayers.
First, I painted a white button down shirt with yellow fabric paint on the front and back. I used masking tape to get a clean line at the bottom. Be sure to put cardboard inside your shirt because the paint bleeds.
Then I used red puff paint to line the button and add the swirlies. I was nervous about getting them symmetrical and wish I had made the swirls bigger.
To make up for the small swirls I decided to add an extra button in the yellow part. Jessie only has two buttons, but after wearing this costume I actually would like to add a fourth.
The cuffs were made out of yellow sheet foam. I cut it to fit my arm and added white sheet foam “tabs” to the side. I outlined the tabs in silver sharpie to give it a shadow.
Next, use puff paint to make more swirls then add buttons to the cuffs. These are the same size as the ones I used on my shirt.
To wear the arm cuffs glue velcro to each side. This way you sandwich it around your arm.
For the belt buckle I cut shapes out of foam similar to Jessie’s for a “longhorn look”
I primed it with Gesso then painted it gold. I attach the buckle with sticky velcro to one of my dad’s brown belts. This way I don’t ruin a belt.
Since I didn’t have any yellow ribbon, I made her bow out of extra yellow foam. I made a pattern first and found a yellow rubber band.
Then I hot glued the foam to the rubber band.
Jessie has red hair in a long braid so I would recommend this wig by Epic Cosplay Wigs. Mine is actually one from Etsy but it was poorly made so I will not recommend it! I will go into this more when I post about my Ariel cosplay ^.^
For the chaps, I bought some cow pattern fabric and laid my jeans on top of it. Then I traced my jeans onto the fabric allowing extra for the seam and a slight flare shape. I added little notches so I could line up my pieces easily when I sewed them together. Each chap was kinda like making a large pillow case. This way there was cow fabric on the front and back sides.
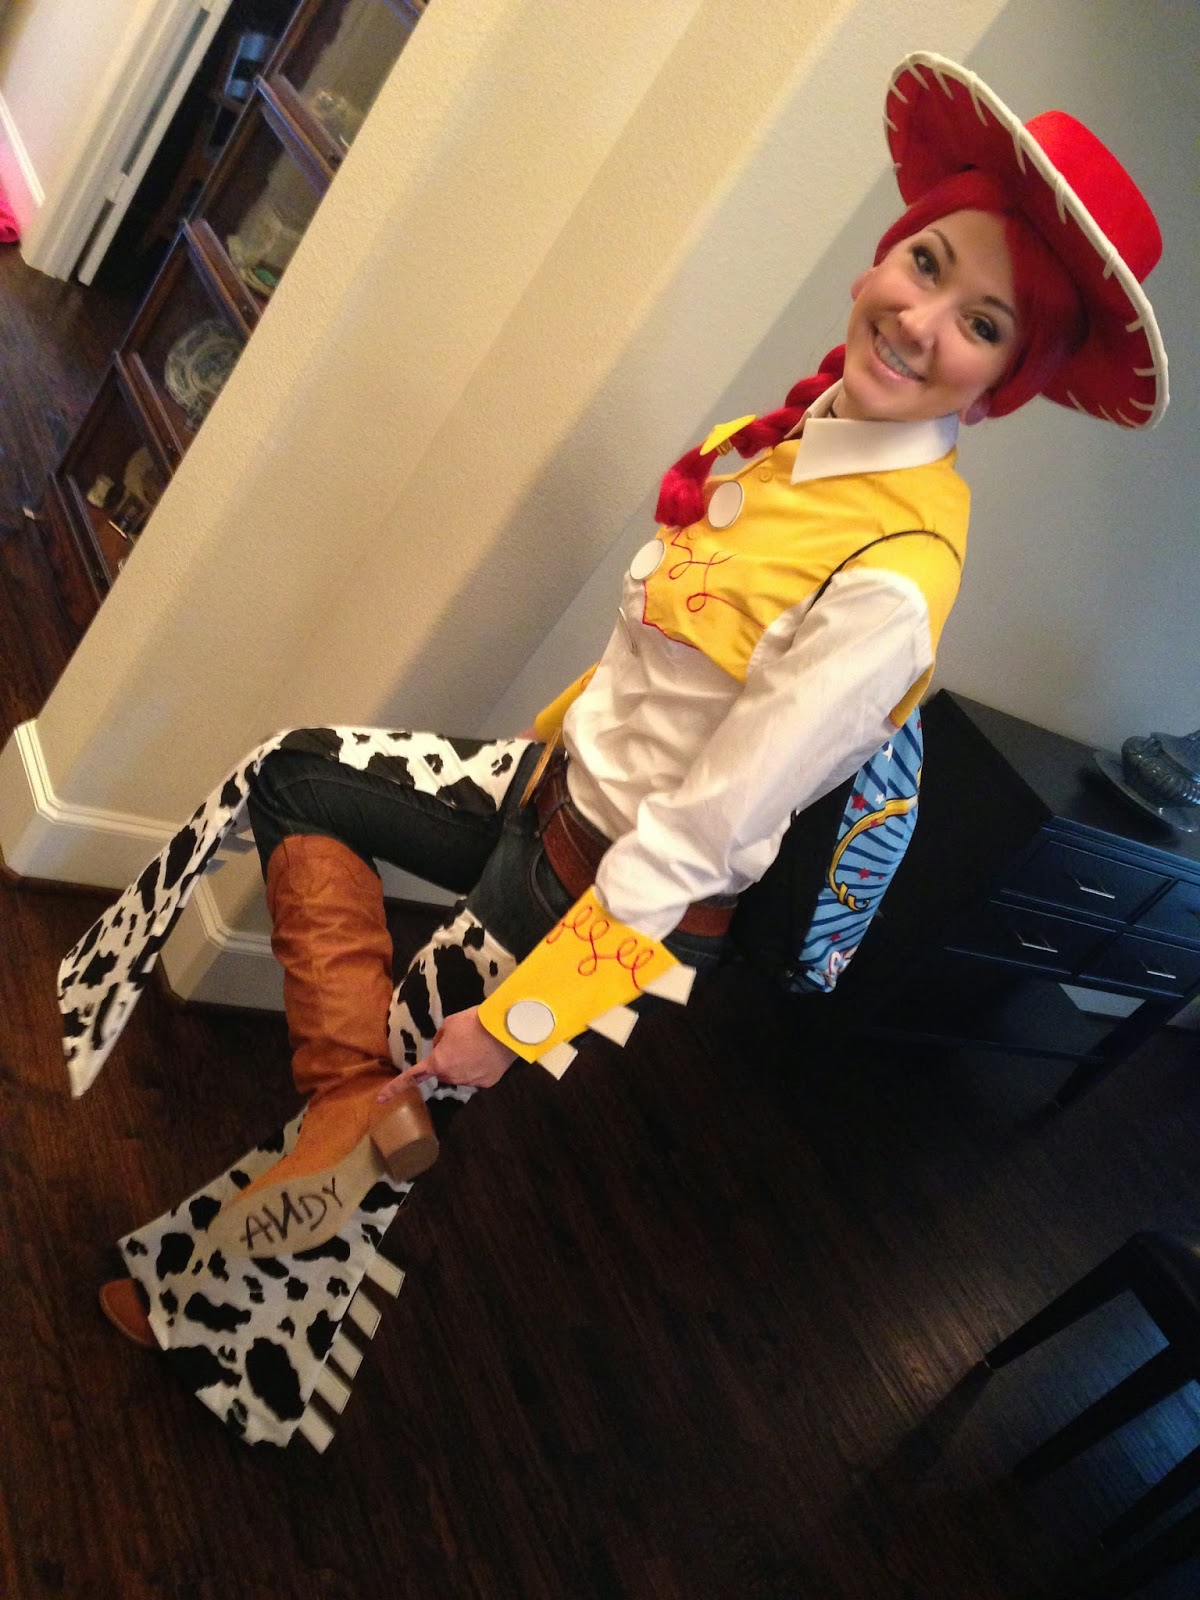
Be sure to write ANDY on the bottom of your boot! I just used a black sharpie 🙂
Jessie’s makeup is very fresh and natural. She has really rosy cheeks and big eyes. Try not to put too much eyeliner on the inner corners to make yours look wider. Give yourself a dark brow and add some pink blush to the tip of your nose for an added glow!
I attached my chaps to my jeans with safety pins. I tried using sticky velcro (so I wouldn’t ruin a pair of jeans) but the velcro did not stick! Small crisis the morning of the con lol … But safety pins worked fine. If I wear this again I would buy some cheap jeans at a thrift store or Walmart and actually sew the chaps on. Also, I added tabs to the bottom sides of my chaps by glueing them onto the back.
I found my hat on eBay. It’s a used official Toy Story licensed hat. Sadly I can’t find any others online to link for you! But this tutorial gives good tips on making one.
My boots are from Ami Club Wear. They sell really high quality shoes for great prices! Most of their shoes are great for costumes because they come in a lot of colors. They also ship very quickly.
Here I am with my friend Garrett as Buzz Lightyear at All-Con. He made his costume, too!!! He looked incredible, and I had a blast walking around with him. The Grouches are also my friends Scotty and Courtney. They also made their own costumes!
:+:+:+:
To view all of my photos as Jessie from All-Con check out my Facebook Album!
Who is your favorite character from Toy Story?
Subscribe to: Post Comments (Atom)


You look amazing! (as does Garrett, lol) This looks very easy to do and I love that you include recommendations on how to make it better. Thanks for sharing!
ReplyDelete
Thanks, as always, for sharing your process with us! I loved watching it all through instagram (I'm really enjoying your Lady Thor pictures right now as well.. can't wait to see a tutorial for it down the road!).
I just got my own sewing machine for my anniversary and you're really inspiring my to get started with cosplay! I hope to be at your level one day!
Elyse @ Cuddly as a Cactus
ReplyDelete
So awesome!!! I love seeing your progress photos of all the costumes you are making!! That wig (color) looks so pretty!
ReplyDelete
You guys look fantastic! I love your tutorials!
And, I cannot wait to see your Rule 63/Lady Thor!
ReplyDelete
My favorite cosplay yet ^_^
ReplyDelete
You looked so much like Jessie. She is one of my all time fave characters to I was super excited when I saw you were cosplaying her. I love the Andy on your boot.
ReplyDelete
Such a cool cosplay!! Great job, and thanks for sharing your guide!
ReplyDelete
How'd you cut the foam on the buckle? I've tried with an exacta knife and it's hideous and uneven.
ReplyDelete
I can't remember exactly, but I usually just use scissors or an X-Acto knife as well. Those little corners can be tough – sometimes those little manicure scissors make it easier!
Delete
What is the name of the boots you purchased, or do you have a link to them?
ReplyDelete
I bought them from http://www.amiclubwear.com .. I couldn't find the exact ones on the site anymore but they have a ton of options! 🙂
Delete
How much cow print fabric did you buy to make the chaps? Thanks!
ReplyDelete
I think I bought a yard and a half and had some left over 🙂
Delete
HELP! I am having trouble with the Chaps, I am not able to make them. What- what material or fabric should I use to make the chaps? Please tell me! Thanks.
ReplyDelete
Hi there! The fabric I used was all cotton from my local Jo Anns fabric store. It already had the cow pattern on it. There's a photo posted showing how I cut and made them. Good luck!
Delete
oh, thank you. but, um, what did u search, i mean, i am buying it online from jo ann's fabric store. what should i search? thank you for replying!
Delete
I bought my fabric at the store. So I didn't have to do a search. I just walked around until I found cow print fabric! 🙂 You could try searching "cow print fabric" and see what pops up on Google.
Delete
HEY, your tutorial was really helpful, but, i can't get the wig in a cheap price from arda wigs or … can you tell me some other "online wig stores" links? thank you 🙂 !
ReplyDelete
I have only purchased from Arda Wigs and Gothic Lolita Wigs online. There's also Epic Cosplay Wigs but all will be around the same price. Which really isn't that expensive when you see how great the quality is. If you want cheap you will get a cheap quality wig unfortunately. You could try eBay.
Delete
aww! anyway, thank you! 🙂
Delete
The innocent world of a child is painted with colors and strokes of his fantasy where toys are their best companions. Playing with toys helps him/her in strengthening emotional as well as creative aptitude.
ReplyDelete
Brilliant! Nice job! Thank you for sharing.
ReplyDelete
This looks awesome. One comment though that in the movie, the N in Andy on her boot isn't backward
ReplyDelete
Thanks for the tutorial! Did you wash your shirt after the paint? My shirt is all stiff.
ReplyDelete
Great tutorial! Thanks for sharing!
ReplyDelete
Where did you find your buttons?
ReplyDelete