Wednesday, July 30, 2014
Giveaway: Flying Packs Shirt
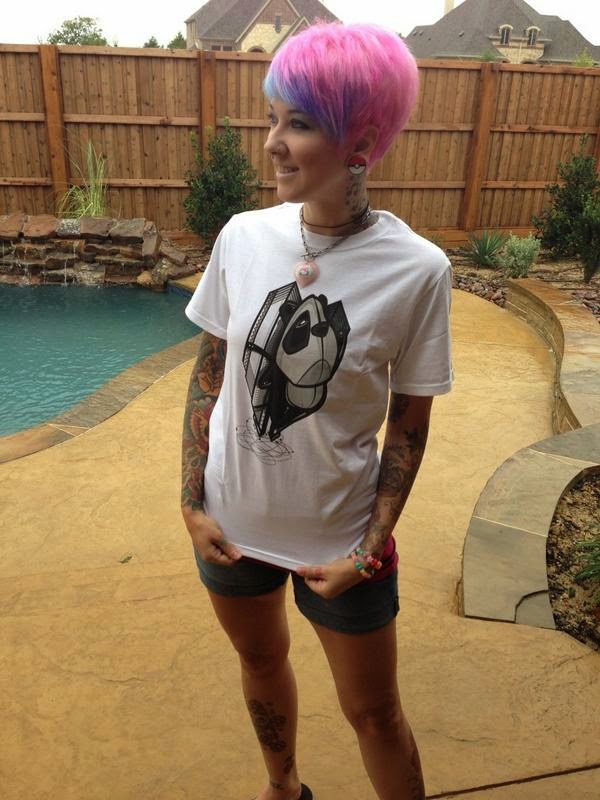
Flying Packs is a t-shirt company based out of San Francisco with a style any Californian would love. Being from Texas, I feel like we don’t get many original and hip shirts, so I was stoked when Flying Packs contacted me about their product! After reading their About section on their website I was immediately drawn to their motto “Don’t think outside the box, think as if there never was a box.” With a unique catalog of shirts to choose from, there’s no doubt males and females will find a stylish shirt to order.
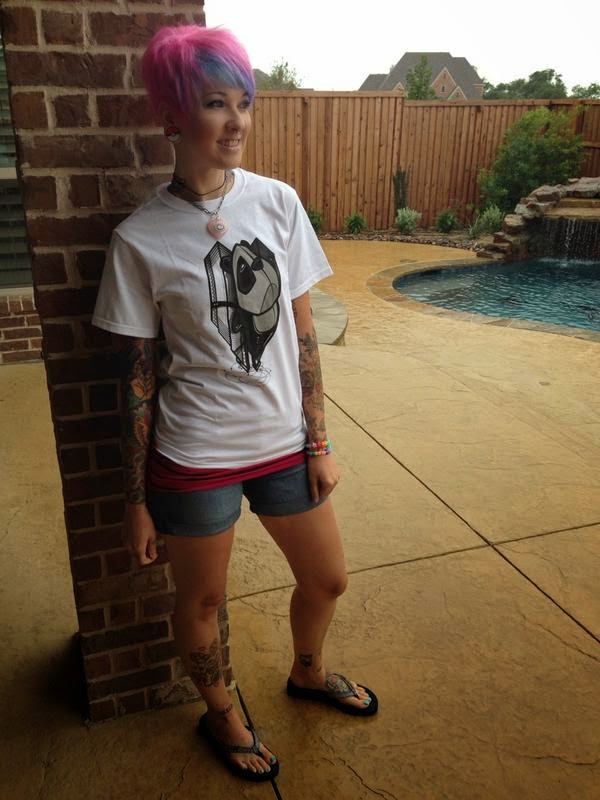
I’m wearing the Flying Panda shirt in a size small and the fit was great! So many shirts run too small for my body type (I’m 5’10”), but I was so happy that the small fit just right. I paired it with a colorful undershirt and casual shorts – ready for a fun day by the pool.
I loved that there is no tag in the neckline, but rather a printed description. No itchy neck! Also, the shirts are 100% cotton and super soft to the touch. Do be careful when washing them, though, and use cold water to prevent any shrinkage.
I love my shirt so much that I want to share the greatness with you! One lucky winner will receive the black Flying Pig shirt I am holding in the photo above. It’s a size medium which will comfortably fit any guy or gal. Flying Packs also sent along several awesome stickers. And to sweeten the deal, I will be throwing in a signed cosplay print by yours truly!
Entering is easy! Just follow these steps on the Rafflecopter widget. One winner will be picked at random and mailed the Flying Packs shirt and my signed cosplay print. Currently, this contest is only open to US residents. Once a winner is selected, they will be contacted by email and will have 48 hours to respond otherwise a new winner will be chosen. Contest ends on Monday August 4. No purchase necessary. Good luck! 🙂
Monday, July 28, 2014
Tutorial: Furry Ears
After watching the incredible Commander Holly make a Rocket Raccoon cosplay for SDCC, I was inspired to make some raccoon ears myself! I figured this would be fun to wear to the premiere of the Guardians of the Galaxy movie. I looked up pictures of raccoon ears for reference, but you could use this tutorial to make cat, bear, fox, or any furry ears!
What you’ll need:
A headband, wire, wire cutter, craft foam, fake fur, scissors, hot glue, Sharpies
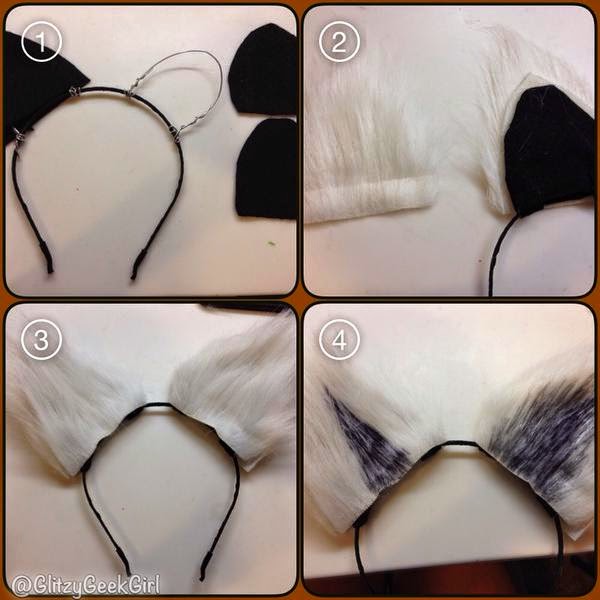
1) Cut your wire to make two ear shapes on your headband. Then sandwich some craft foam around the wire to hide it.
2) Cut your fake fur a little bigger than the foam ears and sandwich them the same way.
3) Glue it all the way around with hot glue.
4) Gently color your fur with your choice of Sharpie. I started with black in the middle, silver around that, and then left the edges white. I would have liked to have added brown, but I didn’t have a brown Sharpie with me. 🙂
Keep adding color to it until it suits your fancy! I also colored the back of my ears to look striped like a raccoon. And since there is wire in the ears you can bend them! I cupped mine a little and folded one ear down more than the other.
Now you’re ready to guard the galaxy as one of the most fierce raccoons ever!
:+:+:+:+:
These ears were so easy to make! I would love to make more in different colors. Let me know if you use this tutorial!
What animal ears would you like to wear?
Will you be seeing Guardians of the Galaxy?
Wednesday, July 23, 2014
AKon 25 – 2014
AKon celebrated it’s 25th anniversary this year at the Hilton Anatole Hotel. It’s one of the longest running anime conventions in the US. I have been 3 years in a row now, and this year I arrived extra early to pick up my badge on Thursday.
The calm before the storm! The hotel is beautiful so it was nice seeing it before it was swarmed with cosplayers. There are some amazing pieces of art throughout the building including a piece of the Berlin Wall.
This was about 9:30 am on Thursday and the registration room was already PACKED with people waiting to pick up their badges. It took me nearly 3 hours to get through the line. Next year I am going to pay extra to just buy my badge on site because that line was nearly empty.
| Photo by The Geeky Seamstress (Ms Marvel) |
After I got my badge that morning I went home to prepare for the masquerade ball that evening. I figured why not check it out since it was included in the badge price. It was fun dressing up in something more original rather than a cosplay. I wore a black skirt with a lace shirt and my black corset. I got my mask at the mall and felt very Victorian!
The next morning I put on my Princess Celestia cosplay and headed back to the hotel. My dad drove me and my mom since the parking was so expensive. We got there pretty early so my mom took a few photos of me in the courtyard.
Once the dealer’s room opened we made our way up and down the aisles. Anime conventions have some amazing merchandise. I prefer them over comic conventions personally. There’s just more of a variety of trinkets and treasures. Like this booth in the photo!
Last AKon I met Yaya Han for the first time. She even complimented my Fiona from Shrek cosplay. Her line was super long this year so I didn’t get to talk to her, but my mom got this good photo at her booth.
While walking through the dealers room I met this wonderful Princess Anna cosplayer! She looked just like her!
I also spotted Ejen from Cosplay in America. His next book will be coming out soon, and I can’t wait to see his hard work published!
The next day I wore my Sailor Ariel cosplay and met up with the other Disney Sailor Scouts. We had been planning this since February so it was awesome seeing it finally come together.
I’ve admired photographer Aperture Ashley and was so excited to have a shoot scheduled with her. She took this great picture of my Sailor Ariel!
Some of the loot I came home with from AKon was a Korilakkuma Kigurumi, Sailor Moon Moonstick, and a Sylveon postcard by one of my favorite artists – Octopie.
:+:+:+:+:+:
I normally upload all my photos to Facebook, but since a whole days worth didn’t transfer to my new computer I won’t be able to make an album. If I figure out how to retrieve them I will update this post! 🙂
My next convention will be Anime Fest which is just a smaller version of AKon. It’s grown a lot over the years, though, so I expect it won’t be much smaller for long!
You can read last year’s AKon post here!
Friday, July 18, 2014
Healthy Hair Color Tips: Bleaching and Funky Colors
A question I am asked a lot is “How do you keep your hair so healthy?” Well let me first admit that my hair has been through a lot! But being a hairstylist that’s quite normal. We love to change our hair color often! It can take a toll on the strength and integrity of your hair strands. So over the years I’ve figured out what works best for *my* hair. I’m hoping this post will help others that might need some hair care advice, but remember everyone’s hair is different. I’ve been doing hair professionally since 2007, and I’ve seen firsthand the effects various dyes and products can do on hair. So definitely talk to your stylist for a professional opinion because they will know best!
For my own hair, I bleach the new growth (roots) with Wella’s Blondor and 40 volume developer. If I need to strip the color out of the ends of my hair I will use a lower volume that is not as strong. 40 volume on the ends of your hair is a bad idea! Sometimes I’ll wet my ends and shampoo it lightly then lather in some 40 vol bleach. That dilutes it a little and won’t be as harsh on your hair.
I typically let bleach sit on my hair for about 30 minutes under a shower cap. If you plan on doing a bright, funky color then you need your hair as light as possible and may need to sit longer. The best way to explain this is to picture a white piece of paper and different color crayons. The colors will be bright on the white paper, but if you took a darker piece of paper the colors won’t be as vibrant.
Once my hair is light enough, I rinse the bleach out with cold water (yes cold cold) and shampoo it with It’s A 10 Keratin shampoo. When coloring, I don’t use conditioner afterwards. This way my hair is more porous and the funky color will last longer.
Then I gently blowdry my hair until it’s completely dry and plan what color I want to do next. Lately I’ve been doing pastels. To make a pastel dye I squeeze a bunch of conditioner into a bowl. (I use any cheap conditioner since I use a lot of it. Just make sure it’s white. I used a blue one once and it didn’t lighten my dye.) Add some drops of color to your conditioner and stir. If it’s too light then keep adding more color until you like it. Here are some brands of color I use:
When you like the color in your bowl, start putting it on your hair. Always start at your scalp and work down the hair strand. Be sure to take small sections and completely saturate the hair. Funky colors will last longer if you really soak the hair in it. Then I put on another shower cap and let it sit for at least an hour. The longer the better! Most funky colors are demi-permanent, which means they don’t have any ammonia in them. They are not as harmful to your hair. Plus most of your concoction is conditioner and letting it sit on your hair for 1 hour+ is awesome. Your hair is so happy right now.
Once it’s time to rinse I use cold cold water again and let it run until it looks clear in the sink. I don’t shampoo or add any more conditioner to it. I just gently towel dry it and then let it air dry quite bit.
When I’m ready to blow dry I first add a quarter size amount of It’s A 10 Keratin Serum. The keratin helps rebuild the strength in your hair after the bleaching. Then I blow dry with a vent brush and flat iron as normal. After that I add another dime size amount of It’s A 10 Keratin Serum to give it a smooth and shiny finish.
It’s important not to shampoo your hair too often. I probably only wash my hair once a week. The natural oils in your hair are great moisturizers for dryness. I swear I am not endorsed by It’s A 10, but it’s also what I shampoo and condition with in-between coloring! I used a lot of products at the salon I worked at, and it’s the one I liked most. A more affordable alternative is the TRESemme Anti-Breakage collection. I’ve witnessed it work very well!
Finally, be sure to get regular trims to take care of any dead-ends, and try to avoid too much sun damage which can fade hair color and dry it out.
I hope this was helpful! Let me know! 🙂
:+:+:+:+:+:
What type of hair products do you love?
Have you ever colored your hair before?
Monday, July 14, 2014
Review: Kuzy Keyboard Cover
My Mac desktop had seen better days so I’ve been saving up to buy a new one for awhile now. I finally upgraded and have been loving my new computer! One thing I wanted to take extra care of was the keyboard. I never used a keyboard cover on my other computer and with all the Pixie fur and Pop Tart crumbs around my desk I really wished I had. So I checked out Amazon and found that the Kuzy Silicone Keyboard Cover had over 1,900 reviews and a 4 out 5 star rating! At only $6.95 and free standard shipping I just couldn’t pass up this deal. It even arrived a few days earlier than Amazon had predicted and was in my mail box 5 days after ordering.
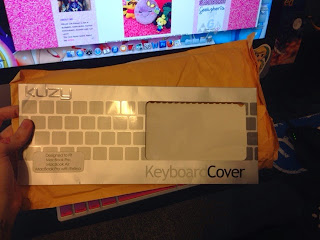
It came well packaged in a bubble wrap envelope. The cover is designed to fit most MacBook laptops and since the newer desktops have the same keyboard design it fit it as well. (My old computer had the keyboard with the number pad, which I admit I sometimes miss.)
The silicone is very thin and flexible. I laid it on top of my keyboard with ease and found that it fit snugly around the keys. I did have to smooth my hand over it to make sure it was stretched from corner to corner well, but this took mere seconds to do. I like that the silicone extends passed the keys, too. Like I said earlier, I eat a lot of Pop Tarts and other snacks while at the computer so I’m glad this will help prevent crumbs from getting stuck under the keys. The cover also comes off with a simple lift to make for easy cleaning.
The colors are exceptionally vibrant! I chose the rainbow design, but it comes in 20 different colors. I’m curious how quickly the colors will rub off after daily use. For now I have only noticed a few color splotches on some keys, and I had to get up close to even see them. Typing feels a little different, but was easy to adapt to. You don’t feel or hear the click of the keys as much. My fingers don’t seem to move the cover at all though, and I still type just as fast as I did without it. Only con would be that the light on the caps lock key doesn’t show up as brightly when it’s on, but that’s minor.
Overall, I am incredibly impressed with the quality and cuteness of this keyboard cover. The best part is that it’s so affordable! I can’t even imagine not using it now. It adds a great pop of color to my desk, and I can relax knowing my keys are protected.
:+:+:+:+:
I want to mention that Kuzy in no way asked me to review their product. I found this on Amazon on my own and wanted to try it out!
Friday, July 11, 2014
Glitzy Geek Mail #1
I love the internet (a lot), but snail mail is so fun to send and receive! Here is some glitzy geeky mail an owl has delivered to me recently.
My Twitter friend @LadySquibbles16 and I have a lot in common, and we both enjoy tweeting about our love of different fandoms (most recently One Direction Oreos)! So when I received a package from her with a My Little Pony bag, Diana plushie, and a glitzy necklace I was ecstatic! Diana is modeling the gorgeous necklace, and Pixie loved meeting a new friend!
I’m so happy to be pen pals with Nerd Burger. We always have fun chats in our letters! And I especially loved the Harry Potter stickers and Frodo heart pin she included. I already put her pin on my jean jacket! You can see her other designs in her Etsy store. She also sent along a really cute comic about Mario Kart, and I love that she decorates the envelopes with fun stickers, too!
If you’d like to snail mail me or send a package I’d love to have a Glitzy Geek Mail #2!
Anna Lee
PO Box 1323
Prosper, Tx 75078
Wednesday, July 9, 2014
Tutorial: Thor Cosplay
 |
| Photo by April Miller |
For the Dallas Comic Con this year, I was asked to be in a Marvel vs Capcom group! I chose to make a Thor cosplay because he's one of my favorite superheroes, and I really like his new design. At first I had a hard time deciding how to tackle this. After brainstorming for several weeks I finally figured out a pretty easy way to make the outfit. I hope this tutorial helps anyone that may be interested in cosplaying as Thor!!
Friday, July 4, 2014
Happy Things #23
Here are some things that have put a smile on my face lately!! 🙂
I ordered the purple macaron pillow from Squishables! It’s a lot bigger than I expected and is great for lounging around while reading or watching TV.
Pixie had a snuggle session with Pascal. They’re best of buds, aww!
I play Guild Wars 2 on and off again and laughed when I met this cute froggie the other day.
(For you, Ser Frog!)
A couple weeks ago I dyed my hair all over purple. There’s some pics on my Instagram (@glitzygeekgirl), but I thought it looked a little too dark. So I bleached it out and went with a pastel pink/purple! I added some more tone to it since this pic, too, and like it a lot!
Aren’t these rainbow sandals totes adorbz?! (lol) I got them at DSW, and the brand is Reef. Reef makes the comfiest sandals in the world.
I couldn’t find a source, but I loved this kitty wishing on stars.
:+:+:+:+:
What has made you happy lately?
Tuesday, July 1, 2014
Sailor Moon Fan Picks and Party Ideas
 |
| Naoko Takeuchi, Toei Animation / Via codenamesailorb.tumblr.com |
Pretty Guardian Sailor Moon Crystal starts this weekend and the buzz is sure growing! I can’t believe it’s already the 20th anniversary and almost the premiere of the new show! The slightly different character designs took a little bit of time for me to get used to, but after seeing our gal in action in the official trailer, I am definitely impressed with the manga look and feel. So to help prepare you for a Sailor Moon filled week, I’ve put together some of my favorite magical girl items and party ideas!
Brush up on your Sailor Moon knowledge by reading the story that started it all. The first volume in the manga series is only $8 at Barnes and Noble or you can grab the box set for $46.
Hot Topic has a great selection of Sailor Moon t-shirts, plushies, keychains and posters. I have this large fabric poster in my room, and I’m dying over this cute rubber bracelet.
I’ve personally ordered from Kuma Crafts and let me tell you this jewelry is so lovely you’ll want one of every style! It’s very high quality, packaged well, and shipped fast. Even though it says “pre-order” on the site, the jewelry is made quickly after you purchase it and ready for you to wear in no time.
Crissy of the Dainty Fawn has some beautiful slouchy crocheted Sailor Moon hats available in her Etsy store! I’ve had my eye on the Sailor Chibi Moon hat – it’s SO cute!
I purchased the new Moon Stick by Bandai Proplica while I was at AKon this year! You can get it here on Amazon with free shipping, too. It’s beautiful and something every magical girl needs!
Fiction-Food.com has an easy step by step guide for making Sailor Moon Waffles! I think this may be the greatest thing I’ve found on the internet, and I can’t wait to try making these.
And while you tune into Sailor Moon Crystal why not transform yourself, too? Michelle Phan, a YouTuber and makeup guru, has a great video tutorial for all Moonies to help us become our favorite heroine.
:+:+:+:+:+:
I’m so excited to watch the reboot this weekend! You can find out more info on the show here.
Will you be watching the new Sailor Moon?
Do you have any favorite Sailor Moon merch or party ideas?
Share with me in the comments below! 🙂
Subscribe to: Posts (Atom)


