Monday, August 1, 2016
Tutorial: DIY Rainbow Highlighter
Have you dreamed of becoming a unicorn princess? Well then this tutorial is for you! No unicorn princess is complete without a prism of rainbows shimmering across their cheeks!
I first saw the rainbow highlighter craze on Instagram when Bitter Lace Beauty first launched their product. Their small independent business exploded overnight. The original product now has a 9-10 month preorder! Due to the long wait, many people came up with a “DIY” version that you can create at home. I followed several guides to see if I could make my own and took some pics of my process! Hope you enjoy!
The first thing I did was visit my local Sally’s Beauty Supply to pick up some of their super cheap eyeshadows. These were even on sale so I got all these shades for only $5. You’ll want to grab one of each color of the rainbow – ROYGBIV! You’ll also need a white shimmer to add to the pigments to make them more of a “highlight” rather than a bright solid color.
You will also need some rubbing alcohol. If you don’t have some on hand I got mine at Target. I am sure any grocery store carries it and it is not very expensive.
The highlighter needs to go in a medium sized pan so I emptied out an old powder I had at home.
Now let’s get messy!
Using a plastic spoon, I scraped out all of the eyeshadow onto a paper plate. I recommend using a muffin pan if you have one because it was kind of difficult to do this on the paper plate.
Also scrape some of the white shimmer into the color.
Add a few drops of the rubbing alcohol and mix your powder until it becomes a paste. Add some more white shimmer to it if it still looks too dark. Then scoop your paste and put it in the side of your pan.
Continue doing this for all your shades!
OoOoooOoo!!
Once you have all your colors in your pan you will want to cover it with a paper towel and use something smooth to press it tightly into the pan. I used one of my blushes and pressed down several times until it stopped leaving wet/colored markings on my paper towel.
Once you have pressed your powder really well, you will want let it dry overnight. This is to make sure it sets completely.
I was nervous to clean the outer edge of mine because I didn’t want it to crack. So I would suggest you do that before it dries completely.
After waiting for what felt like an eternity, it was finally time to play with our creation!
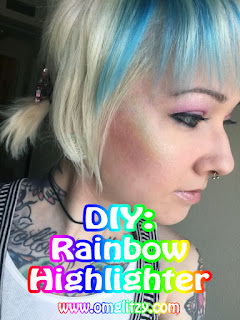
It took several swipes for the pigment to show up on my brush. I may have added too much white shimmer to mine. The idea is to be a highlight, however, so maybe it was just right!
Now I am a unicorn princess like I have always dreamed!
Although it was a messy project, I still found it very fun and rewarding to make. The highlighter shows up best in direct sunlight. However, sometimes it kind of looks like my cheek is bruised. I would suggest using a smaller amount of blue and green! 😛
Let me know in the comments what you think and if you make your own Rainbow Highlighter!
Xoxo,
Glitzy
Subscribe to: Post Comments (Atom)


This is amazing!! I really want to do this. Thanks so much for the tutorial! <3
ReplyDelete
Really cool DIY~! I want to try this out now <3
http://alluringalyssbeauty.blogspot.com/
ReplyDelete
So cute!!
It came out really lovely and totally suits you
SAMI★SPOON
ReplyDelete
I don't care too much about make up, but this is a pretty amazing idea! Also, I just stumbled upon your blog and I have to say I absolutely love it ♥_♥
Hugs, Piskeri
My blog °O°
ReplyDelete