OMGLITZY: Tutorial: Sailor Ariel Cosplay

Monday, November 10, 2014

Tutorial: Sailor Ariel Cosplay

For AKon 25 and Anime Fest 2014, I cosplayed as Sailor Ariel – a mashup of The Little Mermaid and Sailor Moon. The original art for this was done by Drachea Rannak. Here is a walkthrough of how I made my costume. 🙂

I started out with a Sailor Jupiter Halloween costume. I had bought one of each of the scouts a few years ago from a online Halloween store for only $10 each.
Since the Halloween costume was all one piece it was poorly fitting to my body shape. So I decided to order this white tank leotard from WeLoveColors for a better fit.
All I had to do was unstitch the bows and collar from the costume and then sew them onto my new leotard.
Here is a before and after. The skirt was also attached before and now it’s a separate piece.
(Also, these tights were too dark so I later ordered some lighter ones from WeLoveColors.)
I painted the front and back bows with purple fabric paint and made a starfish brooch.
Here’s a test shot with my nude mesh undershirt on and a freshly ironed skirt. Lookin’ good!
The tiara that came with the original costume was a very bright yellow. So I painted it gold to give it a better look.
I bought some white flats from a bridal shop and painted them with green fabric paint. Then I sprinkled some glitter on them before they dried completely.
The trident was originally a devil’s pitchfork from a Halloween store. I took it off the smaller pole and attached it to a longer PVC pipe.
Next I sanded it all really really well and primed it with Gesso.
Then I spray painted it gold.
To hide the devil’s face I glued some rope around the pole. I added some starfish to it for a nautical look but later took them off.
Photo by Aperture Ashley
Here is the completed look! I added some green ribbons to my ankles and around my neck. For details on my wig please visit this post.
And since no one really takes pics of my back here is one to show you the back bow.
Photo by Aperture Ashley 
Photo by AC Cosplay Photography
:+:+:+:
I’m proud of this costume because it was very inexpensive but looked well put together. I hope people see that using Halloween costumes and props is okay! Just add some creative touches to it, and you can make a really nice cosplay.

To see more photos of my Sailor Ariel in action be sure to check out my blog posts of AKon 25 and Anime Fest 2014.

6 comments:

  1. Repurposing an old costume is such a great idea! Especially for people who may not have amazing sewing skills. Plus, it's recycling and saves money. Great job, looks awesome!
    www.cosplaycents.com

    ReplyDelete

  2. Oh wow! This just shows how you can take a $10 costume and make it look amazing!

    ReplyDelete

  3. You are so clever with your cosplay. i love that you take things and change them ino what you need them to be. Loved your costume so much.

    ReplyDelete

  4. I love this so much!! So creative and it's a lot easier than I would have ever imagined! This is wonderful!

    ReplyDelete

  5. Great costume! It really is a brilliant idea to take an old Halloween costume and purpose it to look so fantastic without spending tons of money and hours sewing. Well done.

    ReplyDelete

  6. Great costume. Suits you well.
    But to be honest, i definitely like your Sailor Venus Cosplay the most.
    You're just amazing as Sailor Venus.
    Greetings from a fan from germany =)

    ReplyDelete

Note: Only a member of this blog may post a comment.

Related Posts Plugin for WordPress, Blogger...

OMGLITZY: Tutorial: Rapunzel Tiara

Monday, March 9, 2015

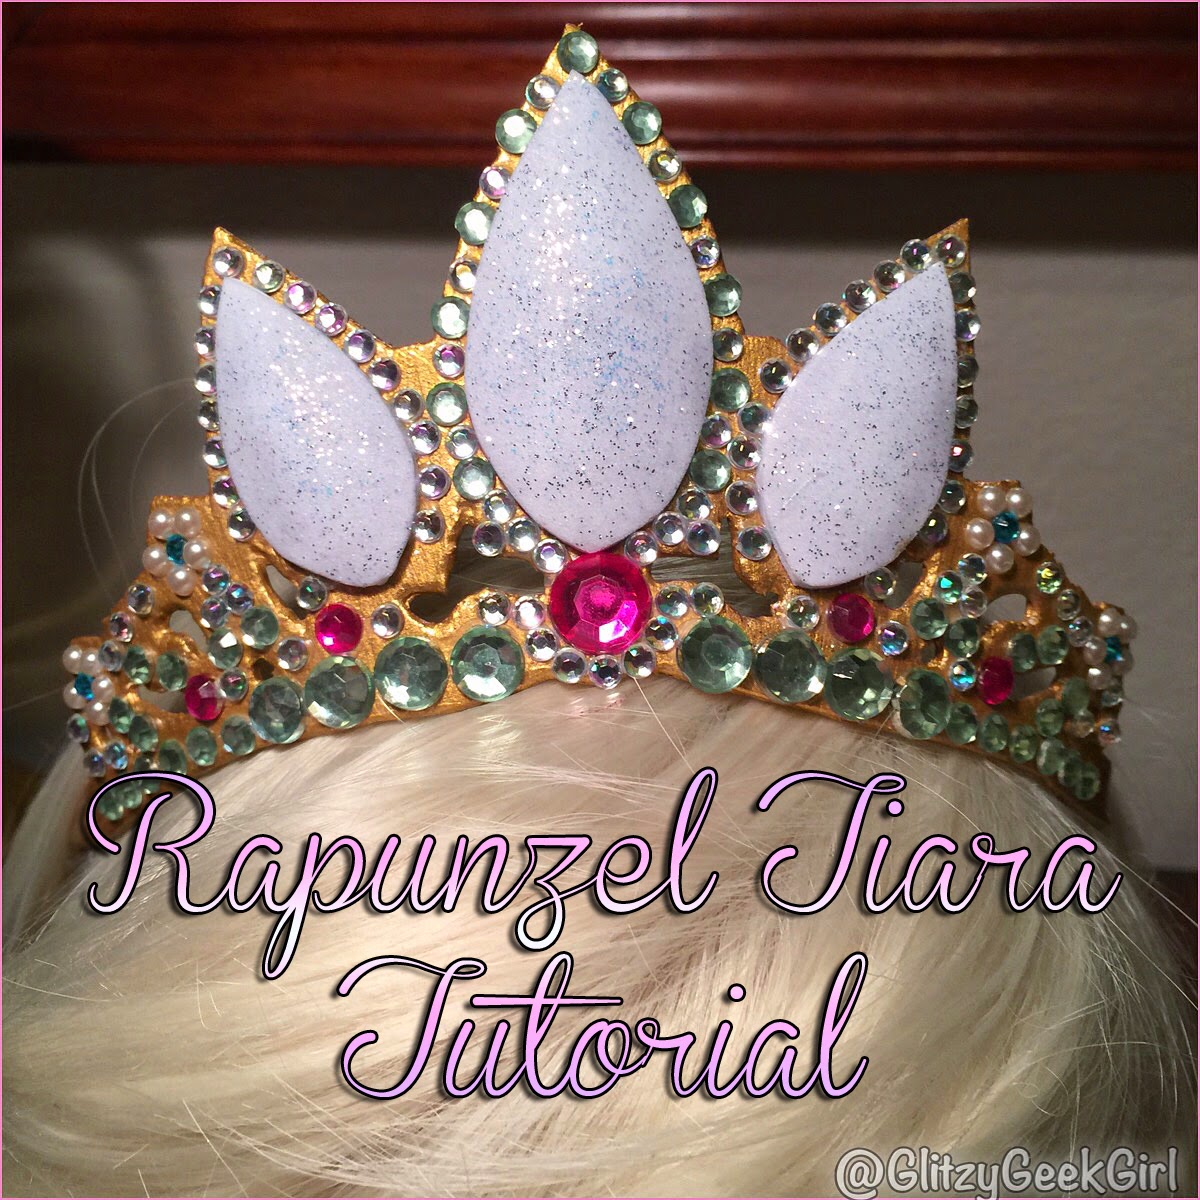
Tutorial: Rapunzel Tiara

I’ve got a dream! I’ve got a dream!
It’s to be a princess, of course! I had been looking for an affordable Rapunzel crown for quite some time but sadly could only find child sizes. So one night I decided to make the crown myself with whatever materials I had laying around.
 And to help other lost princesses I decided to make a tutorial so you can become royalty as well!

Rapunzel’s tiara is beautiful! But where do you start? Well, the first thing I did was find some good reference shots from the movie. While I was searching I found this helpful template on the official Disney Family website.

I printed out their template and taped it to a sheet of craft foam. Then, on a cutting board, I carefully cut the shape of the crown out with an X-Acto knife. After I had my base shape I played around with the template and the jewels to figure out how I would add “bling” my tiara.
To prep the base of the crown I painted it with two coats of primer called Gesso. This will stiffen the foam for added stability and also make the paint go on easier. Then I painted two coats of gold acrylic paint and sealed it with a satin clear finish.

Since I didn’t have any large teardrop shaped jewels on hand, I decided to make some out of foam. All I did was cut out the jewels from the left over template and trace them onto a sheet of white foam. Then I used my clear satin finish to give the jewels shine and sprinkled some silver glitter onto them. I added a tiny bit of a cotton ball underneath each of the three jewels to give them a beveled look and hot glued them onto the gold base.
The rest of the jewels are just acrylic gems I had in my craft room. I used some tweezers and Tacky glue to hand place each gem. I tried to get the look as close to the original as I could, but you can use your creative freedom here to decorate your tiara any way you’d like.

To wear the crown, I attached two metal hair combs. These can be purchased at most craft stores.
Just spread some hot glue on the back of your tiara. Then lay the comb on the glue and gently press it down. I also added a thin layer of glue on top to sandwich the comb in.

That’s it! All done!

This project was very easy and also fun to do! I would love to make another one with different types of jewels and colors someday. It took a little time to individually glue down each jewel, but if you turn on some Disney tunes or watch Tangled while you make it you’ll be done before you know it.

I would love to cosplay as Rapunzel someday!
Even if I don’t make her full costume, I still love having this tiara on display in my room. It’s so light weight it could be worn as part of a Disney Bounding outfit, too! Maybe next time I visit Walt Disney World I will bring it along.
:+:+:+:+:
Which Disney princess tiara is your favorite?
If you use my tutorial to make a Rapunzel Tiara be sure to send me pics!

9 comments:

  1. You did a fantastic job! How awesome that Disney had a template to use!

    ReplyDelete

  2. This comment has been removed by the author.

    ReplyDelete

  3. You did a great job! It's looks lovely ♥

    decapitateddreams.blogspot.com

    ReplyDelete

  4. This is absolutely lovely. I'm in awe of what you pull off with craft foam!

    www.thegeekyseamstress.com

    ReplyDelete

  5. Love love and love thanks for sharing 🙂

    ReplyDelete

  6. So cute! I really need to starting playing with craft foam!

    ReplyDelete

  7. Sooo cute!
    I like your tutorials! They're so helpful!

    ReplyDelete

  8. This is too cute!! I should do this with my munchkin cousin.

    ReplyDelete

  9. Omg! This is such a cute idea! I really have to try this out. I was looking for a crown on ebay a few days ago but this idea is much better and cheaper.
    Blue Books and Butterflies

    ReplyDelete

Note: Only a member of this blog may post a comment.

Related Posts Plugin for WordPress, Blogger...

OMGLITZY: Tutorial: The Quibbler DIY

Tuesday, September 24, 2013

Tutorial: The Quibbler DIY

So this is probably the easiest tutorial ever! But I seriously had so much fun making it! In two weeks I will be cosplaying as Luna Lovegood at Dallas Fan Days… So I made the tabloid from the wizarding world called The Quibbler!
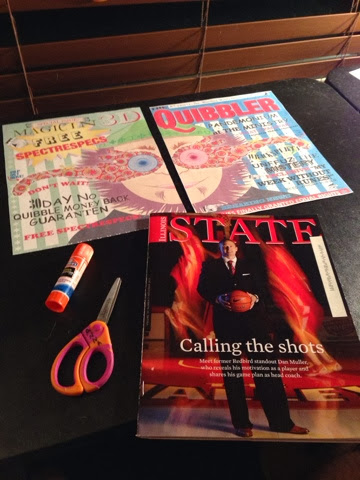
Supplies needed:
Image of a cover of The Quibbler
An old magazine
Scissors
Glue stick
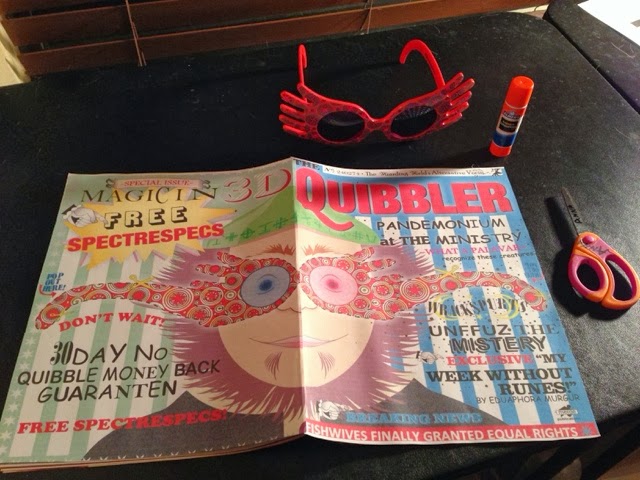
I found my covers of The Quibbler on Google’s image search. There were a few different ones to pick, but I liked the one with the Spectrespecs since I have a pair! I used Photoshop to resize the covers to match the size of my magazine. Then printed them out and cut the white off the sides. Any old magazine will do. I picked one of my dad’s sports issues because I liked the size of it. (Which was 8 inches by 10.5 inches)
Be sure to put plenty of glue around the edges and corners of the magazine. Then lay your image on top and smooth out any wrinkles.
Luna reads an article about ancient Runes which required turning it upside down! Also, I ordered my Spectrespecs from the official WBShop.
:+:+:+:+:
So there ya go! The easiest Harry Potter craft ever! If you really want to .. you could print off cool pages to glue inside, too! I can’t wait to show you my finished Luna Lovegood costume. And I REALLY can’t wait to meet Tom Felton at Dallas Fan Days!!!!! 🙂
:+:+:+:+:
Who is your favorite character from Harry Potter?

4 comments:

  1. I've been wanting to do a Lovegood cosplay for while now and I had no idea where to get the quibbler. YAY.. Thanks dude.

    ReplyDelete

  2. I just adore Luna! SO glad you have chosen to make this post, it's a fantastic idea. Have fun and wear your shoes to bed if you're prone to sleepwalking!

    ReplyDelete

  3. Aw! Luna is so great!!!
    I have needed some Quibbler images!!!

    ReplyDelete

  4. I can't wait to see the final costume!

    ReplyDelete

Note: Only a member of this blog may post a comment.

Related Posts Plugin for WordPress, Blogger...

OMGLITZY: Tutorial: Princess Peach Crown

Monday, July 22, 2013

Tutorial: Princess Peach Crown

I will be cosplaying Princess Peach soon and started by making the crown first! Here is an easy tutorial on how to make your own Princess Peach crown:
*Edit*
Due to the popularity of this post, I decided to create a template you can print out to help make the crown! All you have to do is click HERE to view the full size image and click FILE>PRINT. Be sure to select LANDSCAPE.
I made the template in color just in case you didn’t want to use sheet foam. Just cut it out and glue the ends together! The paper crown would be great for little kids!
Supplies needed:
Gold glitter sheet foam, red & blue gems, scissors, pencil, tacky glue, hot glue gun, and a skinny headband
*I purchased all these supplies at Hobby Lobby*

I made a pattern first to make sure it would look good on my head. This is actually still too tall here.. I later trimmed it some more. Please see my template to print your own. But it’s always better to make it too big than too small then you can go back and fix it!

So I traced my pattern onto the back of my sheet foam and added an extra lip to the edge where I knew I would eventually connect the two ends together.

I cut out two so I could tacky glue them together. This way the inside of the crown is pretty like the outside.

Next I hot glued the gems on and then attached the ends together using the small extra tab.

Then I hot glued it to a skinny headband. You could also glue hair clips instead but I think a headband is more secure.

Tada!

I also made her brooch by taking an oval shaped gem and glueing it to some sheet foam. Then attached a brooch pin to the back.

Excuse my silly face, this was late at night! But here I am wearing my new crown and brooch! I have since purchased a pattern and fabric so I can make Princess Peach’s big dress so check back for progress on that 🙂
:+:+:+:+:
Anyone going to make a crown?
Send me pics if you do! 

15 comments:

  1. This is so cute! I've thought about doing a Princess Peach cosplay lately, I might just have to use your method if I do 🙂

    xo Kristina Rose
    www.thewhimsicaldays.blogspot.com

    ReplyDelete

  2. Love it and I look forward to your Princess Peach cosplay. <3

    ReplyDelete

  3. Your so clever! It looks fantastic. You have to keep us up to date on your dress. I can't wait to see it being made!

    ReplyDelete

  4. So cute! I was just talking about making a Princess Peach crown… For my cat… Long story…
    Thanks for the tips. And I love you Vampire Diaries t-shirt, lol

    ReplyDelete

  5. So cute!
    http://polkadotsandchampagne.blogspot.com/

    ReplyDelete

  6. I love the crown idea! I absoloutley love crowns! I have a fair few :L

    ReplyDelete

  7. I really like it! Thank you for the idea =D

    ReplyDelete

  8. What are the dimensions of your crown?

    ReplyDelete

  9. what kind of glue did you use? I have just plain old elmer's glue, but I don't think that would be strong enough to secure the crown to the headband…

    awesome job, by the way!

    ReplyDelete

  10. I made this!! Tomorrow i am going to wear it with my Princess Peach costume for Halloween. Such a great idea! (except I kept burning myself with the glue gun :0)

    ReplyDelete

  11. girl you are a life saver in all 5 flavors, bless u and this tutorial

    ReplyDelete

  12. What is the diameter of the stick on gems? Thanks 😀

    ReplyDelete

  13. This tutorial is the best!!!!! Thanks so much!!

    ReplyDelete

  14. MUCHAS GRACIAS . ME VA A SER DE MUCHA AYUDA SU TUTTORIAL .. MUY BUENA SU PAGINA .. MUCHAS GRACIAS – DESDE SANTA FE . ARGENTINA .

    ReplyDelete

Note: Only a member of this blog may post a comment.

Related Posts Plugin for WordPress, Blogger...

OMGLITZY: Tutorial: Princess Celestia Cosplay

Thursday, October 2, 2014

Tutorial: Princess Celestia Cosplay

In My Little Pony: Friendship is Magic, Princess Celestia is the co-ruler of Equestria alongside her sister Princess Luna. I had been dreaming of cosplaying Celestia for a long time because she is so majestic and beautiful. She has such a kind and gentle spirit and is a wonderful mentor to Twilight Sparkle and the other ponies. I love her pastel rainbow mane and golden armored accessories.  So for this tutorial I will show you how I made my cosplay!

 
The first thing I made was her accessories. I started with the crown and drew the design on newspaper to make a pattern. Then I cut it out of a sheet of craft foam.

I did the same thing for the necklace.

And the bracelets!

Here is everything cut from the foam.

Next I added details to the pieces using more foam and hot gluing them in place.

I even used foam for the purple diamonds because I have not yet learned how to use resin. Foam is just so easy!
The sun staff was also made of foam and took awhile to cut out all the shapes.
I cut a styrofoam ball in half and glued each piece to a circle. Then I sandwiched the sun rays in-between the two circles.
After all the foam pieces were done it was time to paint them with Gesso. Gesso is a canvas primer that helps the paint look more vibrant and prevent it from seeping into the foam. It also gives it more stability. You’ll want to paint about two or three coats of it – waiting to let it dry between each coat.
After the Gesso was completely dry, I spray painted all my pieces metallic gold.

I also did the bracelets but they are not pictured here. And that trident was for my Sailor Ariel cosplay that I made at the same time as Celestia. The pole on the staffs is a PVC pipe that I sanded, gesso’d, and spray painted.
To wear the crown, I hot glued two hair combs on it so the teeth would stay really secure in my wig’s netting.

I also painted the diamond with purple acrylic paint then sprinkled glitter onto it.
I did the same technique to the diamonds on the necklace and the bracelets. I wore the bracelets by gluing velcro to them and the necklace was wedged into my carpet for a few days to give it a bent look.

The wings were based off of Princess Celestia’s actual design. I enlarged her wings on my computer and taped some tissue paper to it. Then I used a highlighter to trace her wings.

I then traced the pattern onto some newspaper since it’s thicker and easier to work with.

For the structure of the wings I took a clothes hanger and trimmed and bent it into a U shape. I sandwiched the wire in-between the two pieces of foam with hot glue.

Finally, I wrapped the wire with some white ribbon and then added longer ribbon so I could tie the wings on around my shoulders.

The dress I used was one I found at a garage sale. It was a little too short for me so I had to alter it some. For Celestia any white dress will do. But I was very happy to find one that had a Renaissance look to it.
My wig is the Candy Striper in Harmony from Arda Wigs. I split the bangs down the middle and pinned them back with bobby pins. Then I put some of the hair over the back of my crown to help keep it in place. My eyeshadow is gold to green to purple, I used a light shimmery lip gloss, and I made my cheeks a light pink. I didn’t have time to order purple contact lenses so I photoshopped them in this photo.
Some finishing touches I added was a gold rope belt and some rhinestones on the staff. I’m really happy with how this cosplay looked! It was one of my favorites to wear because of the magical and girly feel to it. Cosplaying as a My Little Pony character is a lot of fun since you can have more creative freedom with the design.
I wore this cosplay to AKon 2014, and you can see more pictures in this blog post!
:+:+:+:
Let me know if you found this tutorial helpful, and
if you cosplay as Princess Celestia be sure to send me pics!

15 comments:

  1. I like that you use foam 🙂 I've seen many cosplay tutorials that involve resin and they look great, buuut since I'm not a super serious cosplayer I'm not interested in getting into all that, hahah! Once you have the foam pieces painted they look really nice.

    ReplyDelete

  2. I'm not too familiar with My little pony, but this is beautiful. I love your tutorials

    ReplyDelete

  3. Looks great! I love seeing the step by step process and materials different people use.

    ReplyDelete

  4. Gorgeous! Thank you so much for the tutorial. I love seeing how cosplayers put everything together.

    ReplyDelete

  5. Love this costume! You look absolutely stunning. I totally envy your craft foam skills!

    ReplyDelete

  6. You are so amazing!! Thank you for the detailed tutorial.. it'll surely help in my future cosplays!

    ReplyDelete

  7. Way too cool!! You look beautiful! Gotta love dem ponies.

    – Harlynn
    mindyourmadness.blogspot.com

    ReplyDelete

  8. You are so talented. I like how you use simple easy to buy items in your cosplay as it makes me feel like trying to make the costumes too. 🙂

    ReplyDelete

  9. Oh my goodness! This is amazing! This is probably one of my favorite MLP cosplays ever. 🙂

    www.cosplaycents.com

    ReplyDelete

  10. I love how regal this looks! It's really so spot on for Celestia!
    You look fantastic, and what you do with craft foam is amazing girl!

    ReplyDelete

  11. This is beautiful!!! That wig is amazing. No horn tho? She's an alicorn… that's kind of important. 😀 Otherwise, it's a really great cosplay.

    ReplyDelete

    Replies

    1. No horn, ears or tail 🙂 I was going for a more human look. And thank you

      Delete

  12. Im actually headed to A-Kon later this year, and Im trying to figure out what sort of cosplay I want to make and take with me.Searching for Princess Celestia ideas brought me here.

    Will have to try this 😀 Maybe not for princess Celestia, but maybe for the one I decide on 😀

    ReplyDelete

  13. Quite a lovely costume and nice attention to detail. What thickness craft foam did you use? I'm doing something similar for my daughter. Guess which MLP is her favorite 😉

    ReplyDelete

  14. I just found this tutorial and I just love it! Thank you so much for posting it, I'm planning to do Princess Cadance this year and this has been very helpful.
    Also, I'd like to ask about how you finished the wings (did you use paint or wood glue or nothing at all) and what you think is the best way to cut foam since my edges never come out that clean 😉

    ReplyDelete

Note: Only a member of this blog may post a comment.

Related Posts Plugin for WordPress, Blogger...

OMGLITZY: Tutorial: Princess Anna Cosplay

Sunday, September 6, 2015

Tutorial: Princess Anna Cosplay

Hi everyone! It’s been way too long since I posted, and what better way to come back than with a cosplay tutorial! Halloween is right around the corner, and Frozen isn’t going away any time soon so today I am sharing with you how I made my Princess Anna costume. I wore this cosplay to Animation Celebration last year and this past January I fixed it up a bit and took some better photos of it! I hope you find this tutorial helpful!

In true GlitzyGeekGirl fashion – most of these pieces were found on Amazon. 😉 I’m a “semi-homemade” kind of gal so I like to alter items. Here is what you’ll need for Princess Anna:
Light blue turtle neck – Amazon – $25
Black v-neck tank – Amazon – $8
Royal blue skirt – Amazon – $35
(This is the same skirt I used for my Ariel Little Mermaid cosplay)
Petticoat – eBay – $11
Black boots – mine are from Walmart several years ago
Luthien Wig in Warm Light Brown – Arda Wigs – $40
Blonde hair clip in extension – Sally’s Beauty Supply – $10
Olaf plushie – mine is a backpack from Zulily but you can get one on Amazon for $16
Cape – I bought mine secondhand from a Disney cosplay Facebook group, but here’s a tutorial if you’d like to make your own!
So the first thing I worked on was the black tank top. I bought an X-Large so I had room to alter it. I trimmed the bottom to be more pointed and also changed the neckline a bit with a few small hand stitches. Then I painted a trim around the edges with gold paint.
To add the detail to Anna’s shirt and skirt I used fabric pant and free-handed the designs. I also added some jewels to make it pop.
Back!
Front!
It was a little difficult to get this symmetrical. So I recommend taking your time and having a reference photo nearby. 
The skirt was easy to paint, but also time-consuming since it’s so large. Thankfully, Pixie Kitty was a great helper.
I laid wax paper underneath the skirt so the paint wouldn’t bleed through. Then I traced half a kitchen bowl to get the shape of the bottom design and filled it in with light blue paint.
The green and pink flowers were done with puff paint and jewels. My green paint was a little darker than my liking so if you can find a lighter green I’d recommend that.
My hair and makeup were my favorite things to do! The wig is very thick and didn’t show any net in the back when I parted it. I clipped the blonde piece in near the top and made sure it was covered with a little bit of the brown hair. Then I simply braided it on both sides and used a light brown rubber band at the bottom. Anna’s face is very rosy – so I gave myself pink cheeks and a few light brown freckles.

Here you can see my finished look! I’m wearing the petticoat underneath to give the skirt some fullness (but I did take out the hoop.) And if you’d like to paint your black boots with Anna’s gold design you can – I didn’t since you rarely see the boot anyway, and I use mine for other costumes. The cape was gorgeous – I would have liked to have made one myself, but I got lucky finding this one for sale on Facebook. Big thanks to April Miller for taking these pics!

Do you wanna build a snowman?

I like warm hugs, too, Olaf!

Elsa! You’ve set off an eternal winter!

Thank you so much for checking out this tutorial! I hope it helps! If you use it to make a costume for a convention or Halloween please be sure to send me a photo so I can see! And if you have any questions don’t hesitate to ask.
~Glitzy

8 comments:

  1. This is super cute I love your cosplay tutorials xoxo

    Cateaclysmic

    ReplyDelete

  2. this is gorgeous! love the amazing detailing in the shirt <3
    *.* olaf is such a cute sidekick

    ReplyDelete

  3. YAY! I have missed your cosplay posts. I can not believe how simple you made making an Anna costume look. So have the best tips and tricks. I feel like I might even be able to make this one. 🙂

    ReplyDelete

  4. Your stuff is amazing. I saw the updates you made when you first started working on it! I love all your tips when you create things. Thanks for sharing.

    ReplyDelete

  5. I love this costume. The skirt is very beautifully done!

    ReplyDelete

  6. This comment has been removed by the author.

    ReplyDelete

  7. Thank you so much for this tutorial! I'll be Anna with my friend as Elsa at a party and for Halloween! I was wondering how many bottles of paint you used though, especially the blue for the skirt. When I paint my skirt, it doesn't show up nicely like it does on yours so will I need more paint? Thank you so much! You make a lovely Anna!~♡ ^_^

    ReplyDelete

  8. Thanks for the explanation. Its really good.

    school promotional video

    ReplyDelete

Note: Only a member of this blog may post a comment.

Related Posts Plugin for WordPress, Blogger...

OMGLITZY: Tutorial: The Little Mermaid Ariel Cosplay

Saturday, May 3, 2014

Tutorial: The Little Mermaid Ariel Cosplay

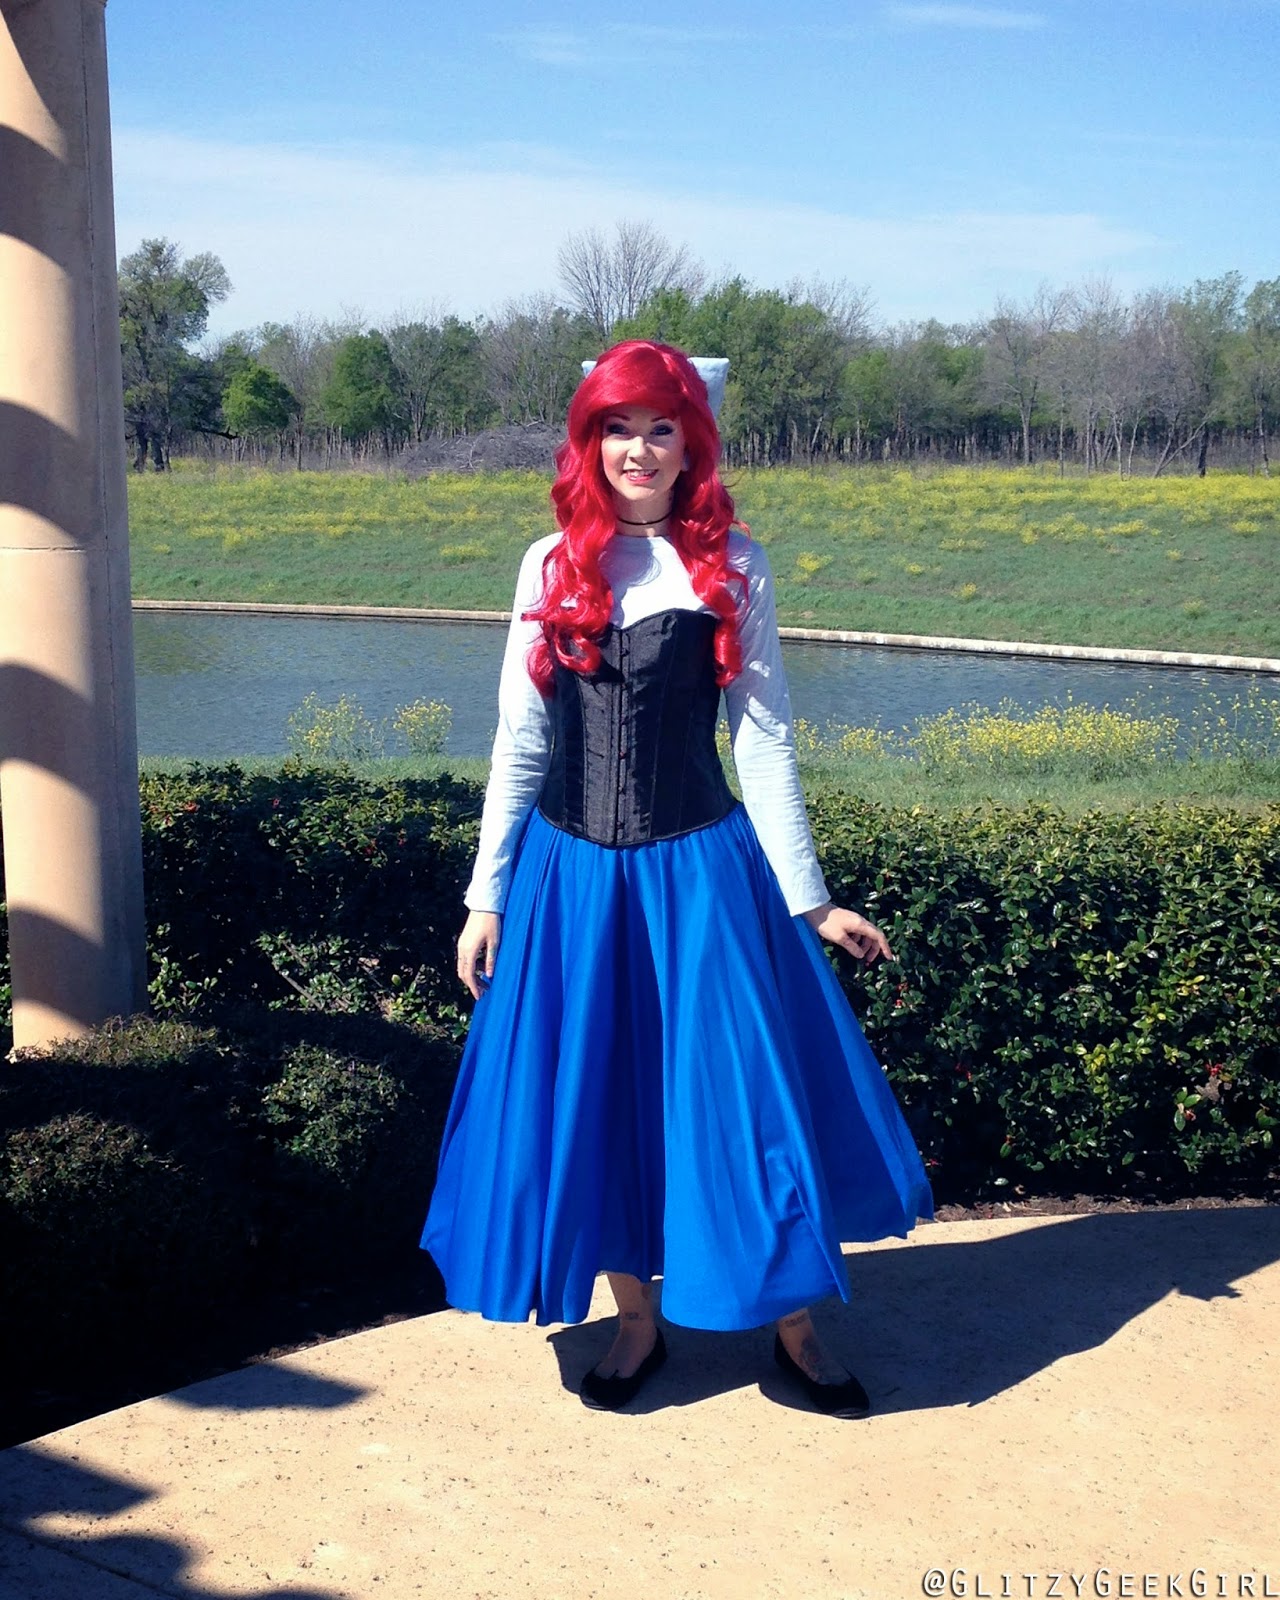
I’m sure you’ve all noticed I’m quite a big fan of Disney Princesses. So it surprised me when I realized early this year that I had not done a single Disney cosplay. Luckily I made up for it quickly by making my Jessie costume with my friend as Buzz. But I still felt unsettled that I hadn’t done a princess! If you follow my Instagram then you know I have done *two* now! So it is my pleasure to share with you my first Disney princess – Ariel in her sight seeing dress! 

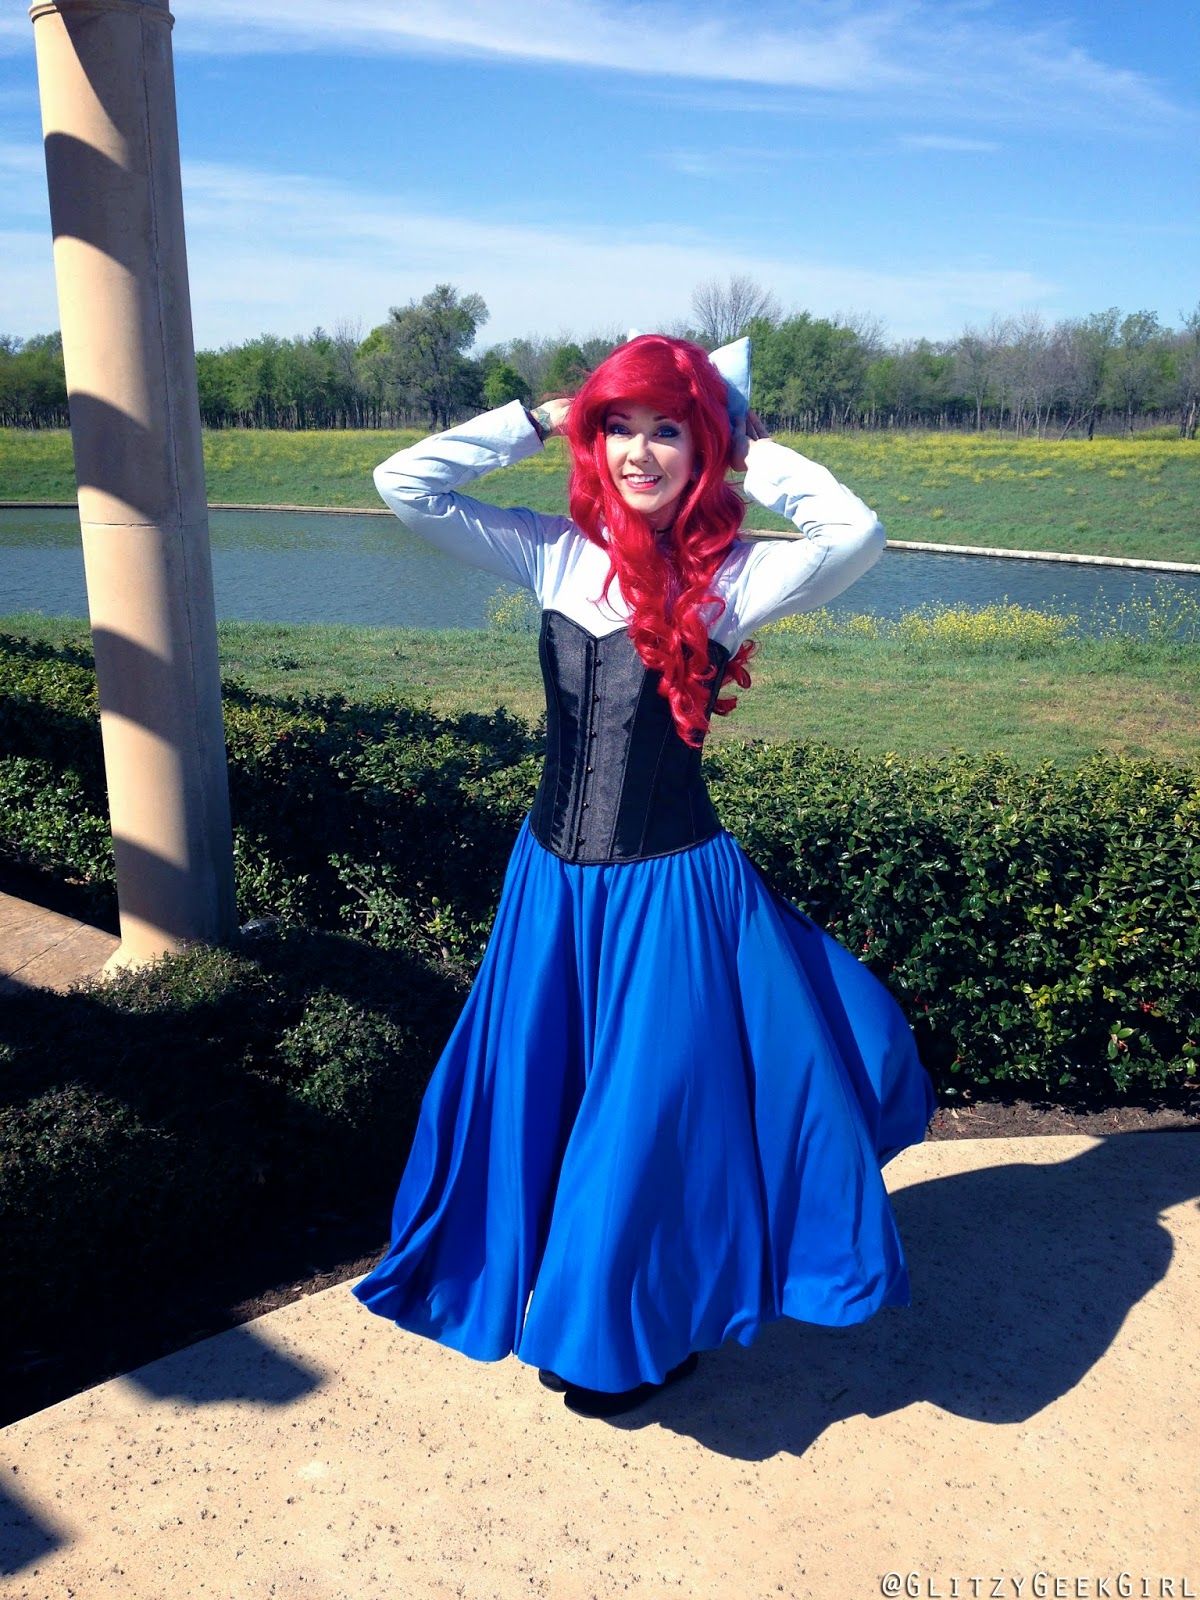
This is an excellent cosplay for a beginner! It’s easy to wear, very recognizable, and kids love it. I enjoy making my cosplays, but I am not a fan of dress patterns. Also, sometimes there’s just not enough time in the day. So for Ariel I searched the web for the perfect pieces to put her together.
Shirt – Amazon – $7
This ships from UK, but was a good price and still arrived quickly. I ordered a XXL because I wanted the sleeves to be long enough. I then altered it to fit tighter in the waist and armpits.
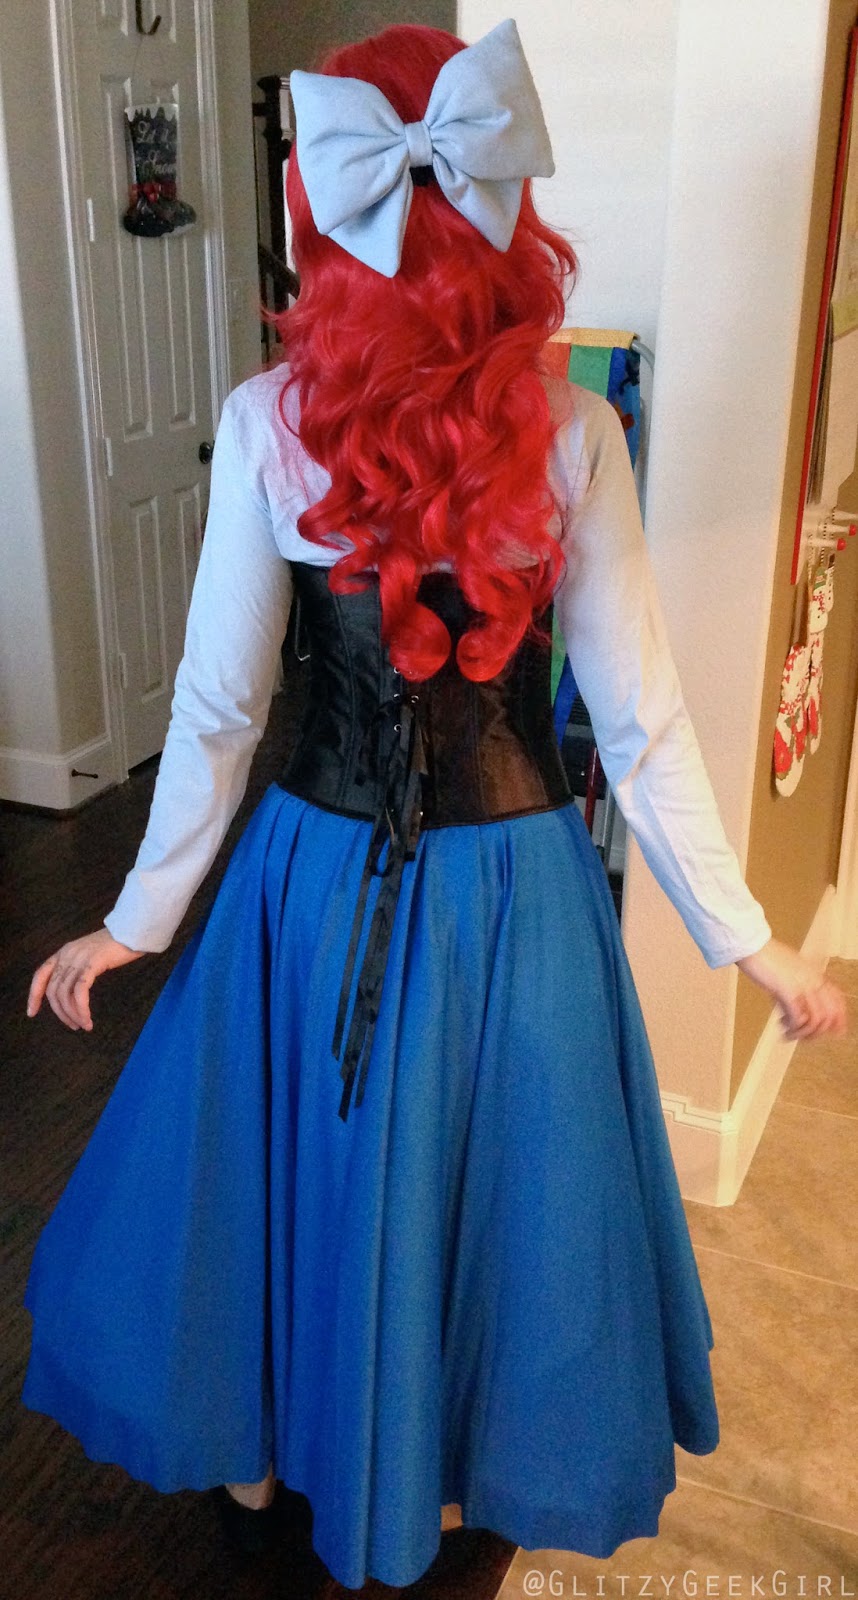
Corset – Amazon – $30
This is a plastic boning corset, but let me tell you the quality is still amazing! It has a modesty panel in the back behind the ribbons and was very comfortable to wear. I colored the silver snaps with a black magic marker. I am wearing an XL in the photos, but I wish I had got a Large.
Skirt – Amazon – $25
Body Wrappers sells several fantastic dance wear apparel. This skirt is super flowy and lightweight. The waist is an elastic band and was comfortable. It lays very flat so I recommend wearing a petticoat under it.
Petticoat – eBay $14
This shipped SO quickly and is super great quality. You have the option to take the hoop out, which I ended up doing. But if you want more of a ball gown look the hoop helps with that.
Shoes
Any black flats will work. I’ve had mine for years.
   
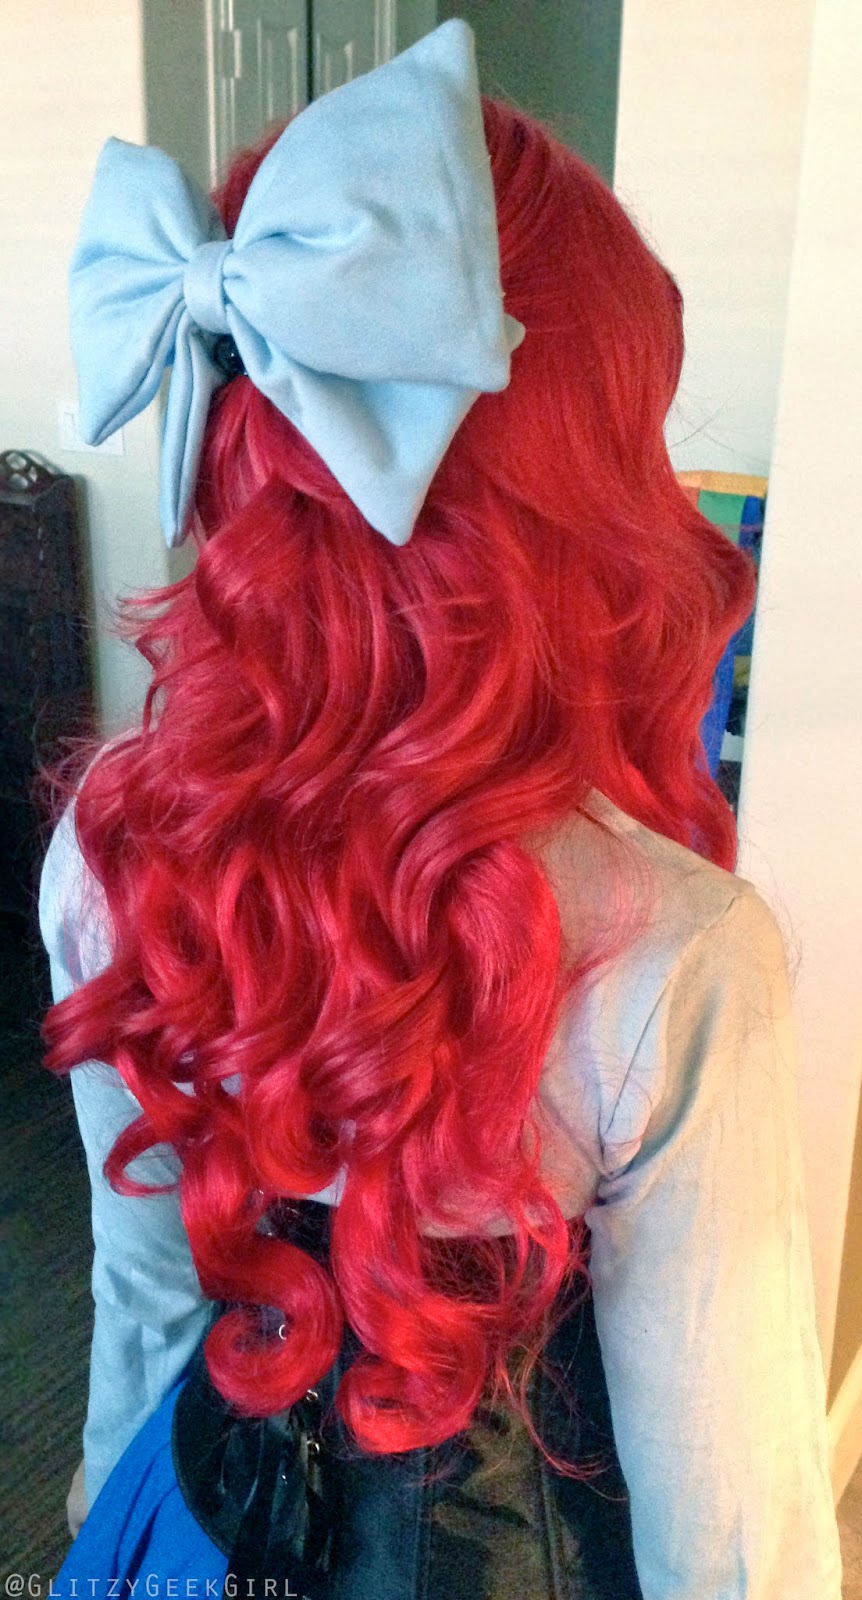
I purchased my hair bow from AngiViper’s Etsy store. This is the “puffy” version. It attaches with a clip and was shipped very quickly! I definitely recommend checking out her Etsy store as well as her fantastic cosplays!
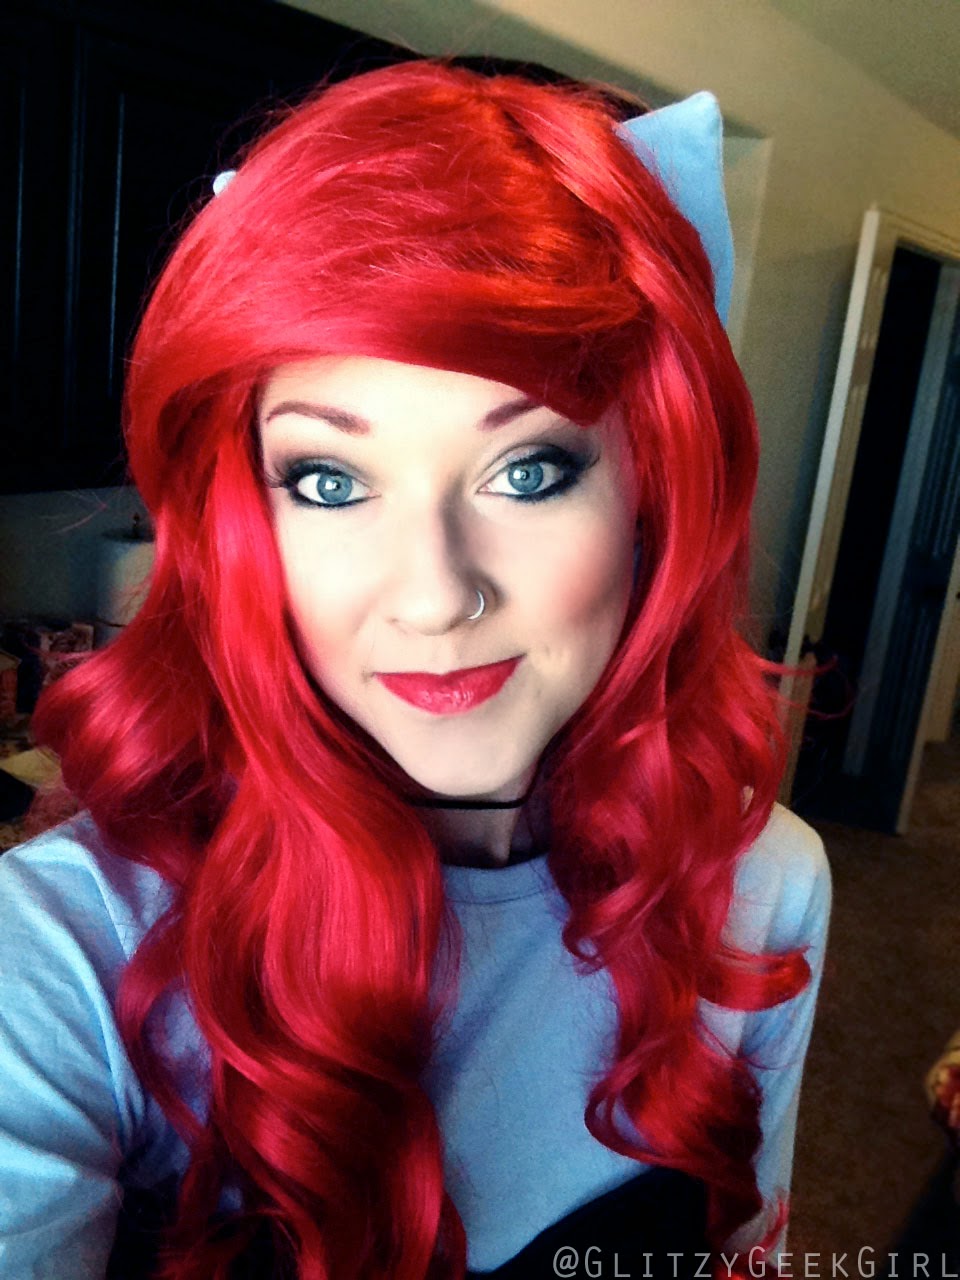
 The wig was a little stressful. I ordered this wig from Etsy and was very disappointed. I do not recommend purchasing it. It was so flat on top I could see the netting! It had no bangs to work with no matter how much I teased them. Also, the part was nearly in the middle rather than the side so I had to turn the wig to get a side part. It was absolutely not worth the price. The seller was pleasant and offered to add more wefts of hair, but I knew what I was wanting and decided to fix it myself. 
I tried on my Black Widow wig to see if that would add more volume to the top and it looked great! So I ordered a Ferrari in Apple Red from Arda Wigs and wore it on TOP of my poor Etsy wig. What I would recommend for you is to purchase a Luthien and Ferrari and layer the two. I don’t think one single wig will give the illusion of Ariel’s voluminous style. But the Ferrari’s bangs are so thick all I did was tease them a little and they were done!
Ariel has some very bold features when it comes to her makeup. She’s rockin’ that fabulous red hair so that means her brows and lips are strong as well. For my makeup, I put on a lot of foundation to give myself smoother looking skin. Then I applied a deep pink to my cheeks and a dark brown eyeshadow. I focused my eyeliner to be heavier on the sides to make my eyes look bigger and also wore false lashes. My eyebrows are very light naturally so I used a small brush to cover them with some red and brown eyeshadow. My lipstick is MAC’s Ruby Woo and was PERFECT! I really felt like a princess!
And that’s how you cosplay Ariel from The Little Mermaid! I plan to wear this again on Friday to Dallas Comic Con 2014. I can’t wait to get more pictures in it. All of these photos were taken by my mom, April Miller!
:+:+:+:+:
If you could dress up as any Disney Princess who would you pick?
Let me know if you use this tutorial for your cosplay! 🙂

23 comments:

  1. I am finding the concept of making all my cosplay from scratch very stressful lately. I love this tutorial. I think Ariel is a fantastic firs Disney cosplay. All the princess dresses seem expensive and difficult. I am going to cosplay Ariel soon. 🙂

    ReplyDelete

    Replies

    1. I like to be crafty, but I am not a very good seamstress. It can be stressful so I find it more fun to recycle and refurbish other items and turn them into something new! And I think you would make a great Ariel!! 🙂

      Delete

  2. I love this 🙂 Its nice to see an outfit put together from other pieces found around the net. Just shows you can make a fantastic costume without making everything from scratch!

    ReplyDelete

    Replies

    1. Sometimes if you add up the time and cost of making something from scratch you might get in over your head. So this costume really was fun to see it all fall into place! I just had to tweak a few things and enjoyed doing that!

      Delete

  3. You make a gorgeous Ariel!!
    Lovely cosplay. c:

    <3
    Harlynn
    mindyourmadness.blogspot.com

    ReplyDelete

  4. Gorgeous! Although I have to admit I thought the bow was a pair of cat ears in the first couple of photos and was very confused. If I was more familiar with Ariel I probably would've realised that it was a bow straight off xD

    How does it feel wearing two wigs? Is it noticeably heavier than just the one? How did you get them to stay in place? I would never even have thought of wearing two and I think it's a great idea.

    ReplyDelete

    Replies

    1. It really wasn't that heavy wearing two wigs. Since the bottom one was so poor/thin and the top wig was shorter it balanced out just fine. I just put one on top of the other and they never seemed to slide out of place at all!

      Delete

  5. You make such a great Ariel! Thanks for the tutorial. I'll have to check out that petticoat when I start working on my Vanessa/Ursula 🙂

    ReplyDelete

  6. You look adorable and what a genius way to fix the wig issue!

    ReplyDelete

  7. How did you get the wigs to look so nice together? I see in the one picture that you just put the one on top of the other. How did you get the top wig to stay on for one, and how did you get them to intertwine so nicely?
    Thanks for your help!

    ReplyDelete

    Replies

    1. I flattened the bangs on the bottom wig and pushed them over to the side. Then I literally just put the top wig on over it. Arda wigs have little straps on the inside that let you tighten them so it stayed on snuggly without any pins or clips. I'm pretty lucky that the colors blended perfect!

      Delete

    2. Alright, thank you so much! I'm working my way through the Disney princesses myself and I just couldn't find a wig. I've wasted my money on two wigs and once I found this it was almost like lightbulb haha. But anyway. Thanks a bunch. You're gorgeous!

      Delete

  8. Thank you so much I was having a lot of trouble with finding the skirt and shirt and your two links were perfect. Honestly I didn't have enough for all 3 pieces so I found a different corset but thank you so so so much for the other pieces, and your wig tutorial was perfect!!! Thank you so much for the help. She is my favorite princess and I really wanted to cosplay her right!

    ReplyDelete

  9. Will definitely be checking them out, I love this set it's so cute!

    ReplyDelete

  10. This is really fantastic for those of us who aren't comfortable making a costume from scratch just yet. Thank you for sharing!

    I noticed that the skirt's reviews on Amazon show that it fits rather small? You provided a link to the large – just wondering what your opinion is on the skirt's sizing? I would normally be a large but I'm thinking I need to go to at least the x-large (I'm 5'11 145lbs 30 inch waist). What's your recommendation based on the size you ordered and how it fit? Thanks for your help!

    ReplyDelete

  11. Hi Amanda! I'm so glad you found this tutorial helpful 🙂 The skirt is very comfy but was a bit tight in the waist. I'm about similar to your size and while the Large did fit I would think an XLarge would be better. The waist had an elastic band but honestly not a whole lot of stretch. And if it's too big you could always take it in some. The length was also just barely long enough for me (I'm 5'10") so an XLarge should help with that too! It's flowy but lays flat without a petticoat so I do recommend putting one under it. Hope that helps! Be sure to share your pics with me when you're done 🙂

    ReplyDelete

  12. Adorable! I'm taking my eight-year-old to go see Little Mermaid, and this is the costume she wants to wear. Do you know if there are corsets or something corset-like small enough for children? (I did a search, but it's only bringing up saloon girls' corsets.)

    ReplyDelete

  13. This comment has been removed by the author.

    ReplyDelete

  14. omg thank you soooooo much i have spent the past week trying to find a skirt and all of them just didnt fit the picture in my head but yours is perfect and that was the only thing i needed!!!! your the best!

    ReplyDelete

  15. omg i have spent the past week trying to find a skirt and all of them just didnt fit the picture in my head but yours is perfect and that was the only thing i needed!!!! your the best!

    ReplyDelete

  16. omg i have spent the past week trying to find a skirt and all of them just didnt fit the picture in my head but yours is perfect and that was the only thing i needed!!!! your the best!

    ReplyDelete

  17. Hi! I realize this post is almost two years old, but I found the link while looking for a wig for Jessie from Toy Story. I got the link to the DIONYSUS- 24" APPLE RED STRAIGHT LONG COSPLAY WIG you shared, and that looks good. I'm just wondering if it is long enough to braid. I also have a Little Mermaid costume I plan on wearing someday, so I was wondering if you would recommend getting the Luthian or Ferrari wig and using it for both Jessie & Ariel? (I'm not too worried about getting the fullness you wanted for Ariel). Thanks for your help!

    ReplyDelete

  18. Finally found this after months of searching and i absolutely love it, cannot wait to do this for comic con Glasgow, i also realized i watch you on twitch you so amazing.

    thank you for being such an amazing person!!

    ReplyDelete

Note: Only a member of this blog may post a comment.

Related Posts Plugin for WordPress, Blogger...

OMGLITZY: Tutorial: Legolas Cosplay

Friday, December 6, 2013

Tutorial: Legolas Cosplay

Since The Hobbit: Desolation of Smaug is coming out next week, I wanted to post how I made my costume for my Legolas cosplay! This was not too difficult to make.. but very time consuming getting all the pieces together. I wore this costume to Dallas Fan Days 2013. I started making it right after I saw the first trailer for the second Hobbit movie!

The first item I looked for was his tunic. I really enjoy recycling other items. So I found this vintage suede jacket on Etsy, and I just knew it would be perfect!!

All it took was trimming the shape into Legolas’ tunic. I cut off the collar, shortened the sleeves and angled the bottom.
The next part was SO MUCH MORE DIFFICULT! LOL … I spent ALL DAY adding the brown suede to the top of the tunic. I am sure there are patterns out there somewhere, but I decided to make my own and “just wing it.” .. In the end it came out exactly how I pictured.
To go along with my “wing it” philosophy.. I freehanded the swirlies with a silver sharpie. I was pretty nervous about this, but had a reference photo (seen here by Alley Cat Scratch) right next to me so I could redesign it.
I also freehanded the swirlies on the back and sleeves based on this reference photo. It’s too bad no one ever saw this since I wore a cloak all day. But I wanted it to be there so it felt complete 🙂

Next I made the quiver.. I just used a cardboard poster tube and wrapped it in some extra brown fabric I had. I used hot glue to attach it to the cardboard.
The arrows were wooden dowels that I painted brown.
And I added convention-friendly arrowheads. These are just pencil erasers painted silver then you glue them to the end of the wooden dowel.
For the other end of the arrows, I cut feathers in half and glued them to each side of the wooden dowel. This was messy because bits of feathers got all over the place.
Here is a finished look at the quiver, bow, and arrows. Also on the quiver I freehanded a swirly design with a gold sharpie (Legolas has a beautiful peacock design on his), and I attached a brown belt to the back. The bow was not made by me.. It’s an officially licensed Legolas bow made out of plastic.. but I thought it looked great! I got mine on eBay for only $10 but they seem to be sold out now.
The cloak was handmade by CloaknDragon, but I had to add a hole in the back so the quiver could go through it.

This wig is the same one I used for my Sailor Venus cosplay. It’s an Eowyn in the color Titanium Blonde by Arda Wigs. I braided it myself!

For the day of the convention, I pinned the two side braids up with bobby pins so they would look more like Legolas. This also helped my elf ears (by Aradani) show better. I did my makeup myself, too.
My leggings were handmade by Wrecking Crew Creation to fit my measurements, and the grey long sleeve shirt is from American Apparel. My boots were from Walmart, and the brown belts were from Target.
The brooch I wore on my cloak was from eBay and can also be worn as a necklace.

And my beautiful bracers were made by RenManLeather .. He customized these to fit my wrist and match the design to Legolas’ actual bracers. These are super high quality; I cannot recommend him enough!

The only thing I wish I had done differently was research how to properly hold a bow and arrow ^.^
I have never used one before and looking back in my photos I realized I wasn’t holding it quite right. So if you decide to make this outfit be sure to look that up!
:+:+:+:+:
I loved wearing this costume at Dallas Fan Days (see that full post here), and I can see myself wanting to wear it again and again. It was pretty comfy and I felt like a magical elven warrior. I am not sure if I’ll get to wear this for The Hobbit premier, but I am definitely excited to watch the new movie and see more Legolas action!
What character from The Lord of the Rings/The Hobbit is your favorite?
Will you go see The Hobbit in theaters?

26 comments:

  1. What a great costume!! Your braids are FLAWLESS!

    I love Legolas (of course!) but I gotta give my little hobbits love, too! ^__^

    ReplyDelete

  2. Anna! This is incredible. You're so talented.

    ReplyDelete

  3. Nice tutorial 😀 Painting the erasers silver is freaking genius!

    ReplyDelete

  4. OMFG. MARRY ME!! XD <333 You look so stunning. I would never have the patience to make my own costume. :O …okay I can't sew… >__> Have to practise. T__T

    xoxo

    ReplyDelete

  5. Great cosplay! My favorite character was always Aragorn but I also like Galadriel and I really can't wait for part two of the Hobbit because we finally get to see Smaug in full force.

    ReplyDelete

  6. I second the eraser arrowheads genius. And of course your hair is totally flawless. Thank you so much for sharing.

    ReplyDelete

  7. Superb! You are so creative. My favorite is Bilbo! I just love him! l

    ReplyDelete

  8. Love love love the idea for the arrowheads. My son has a Hawkeye costume and we never figured out what to do about the tips of his dowel arrows.

    ReplyDelete

  9. Eraserhead as arrowheads= Genius!!!
    Brillint!
    I'm a Aragorn and Legolas fan.
    And my husband bought the tix already I think…

    ReplyDelete

  10. I'm glad you added this tutorial! I really want to go as as a lady green arrow for my next con and I'm still having trouble on how to make stuff. I agree with the comments, your erasers as arrowheads are genius and also using the poster tube as the carrier is very useful! Love this tutorial!

    ReplyDelete

  11. I couldn't help but notice you didn't link the bow! I searched for it on ebay but I didn't have any luck 🙁 Can you please link the bow? I am going as Legolas for halloween this year and I would LOVE to have that bow for my costume! Thank you for the tutorial 🙂 It looks wonderful!

    ReplyDelete

  12. Love love love. gonna try this for the renaissance festival this year! thanks for all the help!

    ReplyDelete

  13. i love this! the arrow idea is absolutely genius! i was wondering how much you had paid for your bracers? also if you could put a link to the bow if you can find it. anyway this costume is flawless and i cant say enough good things about it!

    ReplyDelete

  14. i just died!! this is amazing!!

    ReplyDelete

  15. OMG!!! It is great!!!! I love your costume!!

    ReplyDelete

  16. so amazing! i just stumbled across your blog on pinterest. i can't wait to see what else you do

    ReplyDelete

  17. Hi, I'm really anxious for you to answer. I want to make this costume for Salt Lake Comic Con 2015 and I can't seem to find that suede jacket anywhere. Do you know any places/websites that sell something similar?

    ReplyDelete

    Replies

    1. When I was looking for a tunic for Legolas I searched and searched and searched. I tried different clothing sites, eBay, and Amazon. I eventually found mine on Etsy from a vintage seller. Try changing up the words you use when you search online like "tunic, tunic dress, brown suede, green suede, etc" or try visiting thrift shops and garage sales. Good luck!

      Delete

  18. I reallly like this and i am trying to make it myself. Can you please give me a link to the suede jacket. i cant find it anywere.

    ReplyDelete

    Replies

    1. Hi there! I actually said in second paragraph "I really enjoy recycling other items. So I found this vintage suede jacket on Etsy." It was one of kind. If you look at the comment right above yours you will see some suggestions I gave to another person also looking for a tunic. Good luck! 🙂

      Delete

    2. Ohhh. thank you!

      Delete

  19. So im a really BIG fan of LotR. I love everything you did here. i have read the comments and everything and i know youve given suggestions, im just wondering, do u remember the name of the user you bought your green tunic from. If you dont thats ok, i was just wondering.

    ReplyDelete

  20. Love it! Im going as Legolas to a convention in june. My favorites are Legolas, Gimli,Pippin, and Éowyn

    ReplyDelete

  21. Just an FYI- yes, you were holding the arrow wrong. Real arrows have a nock in the end where you clip it on the bow string, then you lift the bow, draw the arrow back smoothly with two fingers up to your cheek, then (if shooting) release. Otherwise, just ease up until the bow is slack. DO NOT LEAVE THE BOW TAUT OR EVEN STRINGED FOR A LONG TIME. Remember to unstring the bow when you're eating or waiting in line so the bow doesn't get harmed. Also don't dryfire, or pull back the string and release without an arrow. That can break the string or weaken the bow itself.

    Also, I noticed you kept the tip of the arrow between your fingers. DON'T DO THAT! If you release it, the fletching (feathers) will catch on your fingers, in addition to a burn from the friction of your fingers sliding along the wood, and possibly a splinter.

    Maybe just take an archery class. That could help.

    Anyways, thanks for listening to me ramble on about safety and proper care for a bow. Of course, I'm talking about a classic bow, not a compound bow here, although the basics are the same.

    – Eeveecat1248

    ReplyDelete

    Replies

    1. I forgot to mention the proper way for your non-dominant hand to rest. Instead of gripping the tip, let the end of the arrow rest gently on the top of your knuckle when you release. Beginners also sometimes lift their index finger over the arrow as they draw it back, but NEVER LEAVE YOUR FINGER THAT WAY.

      – Eeveecat1248

      Delete

Note: Only a member of this blog may post a comment.

Related Posts Plugin for WordPress, Blogger...

OMGLITZY: Tutorial: League of Legends Annie Cosplay

Friday, April 4, 2014

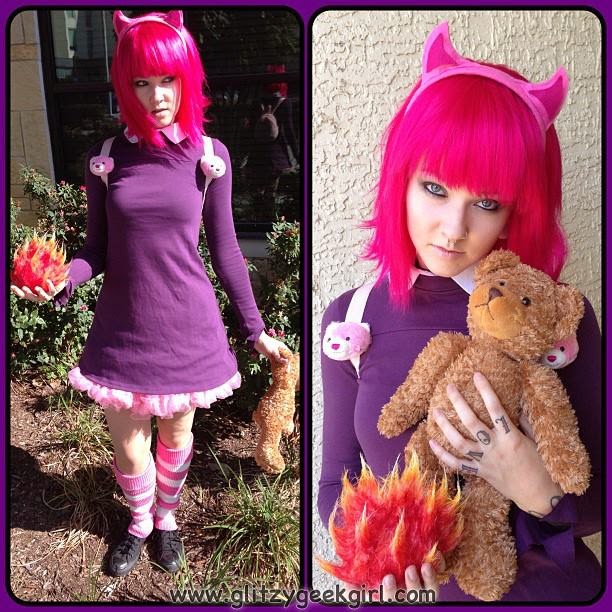
Tutorial: League of Legends Annie Cosplay

Since PAX East is in a few weeks it got me thinking about my trip to PAX Prime last year! Then I realized I hadn’t posted a tutorial for my Annie cosplay from League of Legends. I won’t be able to go to PAX East this year, but here’s the tutorial in case someone wants to dress up as Annie!

This was the version of Annie I was going for. 
I got my dress from American Apparel. I altered it some to fit better and added the fringe to the bottom of the sleeves. I would love to add the swirl design to my dress since I didn’t have time to before. The petticoat and leg warmers are from Amazon. The wig I used was a Jareth in Raspberry from Arda. I did cut it quite a bit to get Annie’s bangs and style. I already owned black shoes and a white collared shirt, but I am sure you can find that easily at Walmart or on Amazon!
For the fireball prop, I took a styrofoam ball and hot glued fake fur to it. I found all these supplies at my local craft store.

I really just randomly snipped at the fur and glued it in place until the whole ball was covered.

Then I used hairspray to give the fur a spiky look.
During this step I recommend that you wear gloves! Because the Sharpies stained my hands pretty bad. Basically, I started with the red and hand colored the root of the fur. Then I worked my way up with the orange and finally added yellow to the tips.

For Annie’s headband you will need a headband (any color), light and dark pink felt, cotton balls, hot glue, and scissors. I made a pattern for the ears out of paper, too.

Cover your headband in the light colored pink felt using the hot glue.

After you cut out your shape for the ears (or horns.. they kinda look like either) stuff a cotton ball inside it to give it volume.

Tada! No sewing required! I want to make all different colored cat ears now 😀

Annie’s backpack was sad to make. I found a kid’s pink fluffy backpack on Amazon and bought two of these bears. (The backpack I bought is no longer listed, but this one is very similar.)

Here’s the sad part… I’m so sorry little bears!!  *cry*

So all I did was stitch up the back of the little bears heads and then hand stitched them onto the straps of the backpack. The Tibbers that I carried around was found at Toys R Us. He was thankful he didn’t get beheaded.

“You smell like burning!”
:+:+:+:
Let me know if you make an Annie cosplay!
Do you play League of Legends?
If so who is your favorite champion?

22 comments:

  1. I'm not trying to hate, this tutorial was actually helpful, but you do know that is not what Annie actually looks like right? It's sorta similar but not correct.

    ReplyDelete

    Replies

    1. You may not have been "trying" but your comment did come off as rude and unnecessary 🙁 Cosplay is supposed to be a freedom of expression. It's an art. I posted a reference photo of the version of Annie I was going for, but even if I didn't judging a cosplay because it's not "exactly perfect" is why so many people are afraid to try it. Cosplay can be so many things! I want people to feel encouraged to embrace their favorite characters whether it is an exact replica, fan interpretation or an original design. It's about having FUN and enjoying yourself.

      Your comment sends a wrong message to the cosplay community. I hope you think to remember a real person is behind the computer the next time you try to tell someone their art is not correct.

      Delete

    2. Your costume looks awesome, just like everything else you do.

      Delete

  2. Yep, pretty sure she knows Annie in reply to other post. Uh, reference photo >-<. Hey Glitzy I met you at Pax and got some great pics. You always put fun spins on your coz costumes. Looks like a good con coming up. Need to head that way.

    ReplyDelete

  3. I think you look great, and did an amazing job at recreating the version you were going for! Also, the Fireball, is really creatively done!

    ReplyDelete

  4. This looks totally awesome! I can't imagine how long it took to colour in that fire ball :O

    SAMI★SPOON

    ReplyDelete

  5. Cosplay doesn't necessarily have to look EXACTLY like the character. I love this and it's amazing! You did a really great job!

    ReplyDelete

  6. Girl you're so creative!!
    Also goregeous. c:
    I love your cosplay posts. c:

    <3
    Harlynn
    mindyourmadness.blogspot.com

    ReplyDelete

  7. This is one of my fave cosplays you've done. You look so adorable. This was a really helpful tutorial.

    ReplyDelete

  8. The top comment seriously makes me angry, your cosplay is great. Evidently jealous 😛

    I wish i had even an ounce of talent for making cosplay, gets so expensive buying costumes!

    ♥ Little Owl Diary

    ReplyDelete

  9. The fireball looks amazing! I thought it was an edit when I first saw the picture c: everything else looks amazing too of course

    ReplyDelete

  10. Definitely going to use this. Thank you 🙂

    ReplyDelete

  11. I actualy make a Annie cosplay for my little daughter and your tutorial was really helpfull ! Thanks you !

    ReplyDelete

  12. How in the world did you get the fur to stay?! Lol

    ReplyDelete

    Replies

    1. I used hairspray 🙂 There's a picture of the kind I used.

      Delete

  13. ¡Muchas gracias por el tuturial! Estaba buscando un tutorial de como hacer un cosplay de Annie (para la comic-con Chile 2015) y la verdad es que todos eran bastante malos, pero te econtre y fue como "Oh, esta chica es increible" ¡Muchas gracias!

    ReplyDelete

  14. Thank you soooo much for this tutorial ! Currently i'm trying to make an Annie Cosplay for the next TGS in France and this is really helpfull ! I love your fireball, so jealous 😉

    ReplyDelete

  15. This is extremely helpful. My husband and I are hoping to be Annie and Tibbers for Halloween this year. I have already bought some great stuff and I just hope my costume comes out as great as yours does!!!

    ReplyDelete

  16. did you buy the leg warmers or make them?

    ReplyDelete

  17. I think it's really helpful and you got mad cosplay skills. I'm gonna do Goth Annie for Comiccon and I can't seem to find tutorials for the fireballs anywhere else, so this was a big help:3

    ReplyDelete

  18. Omgggg ilove it.. and u sure do look like her.. Thats why I love Annie and all of her alt outfits she have.. Im planning to do this cosplay for Puerto Rico Comic Con back in my island and that fireball tutorial sure is an awesome way to make it.. When i make it.. Im gonna show it to u,.. Keep doing awesome cosplays

    ReplyDelete

Note: Only a member of this blog may post a comment.

Related Posts Plugin for WordPress, Blogger...

OMGLITZY: Tutorial: Jessie from Toy Story Cosplay

Tuesday, April 22, 2014

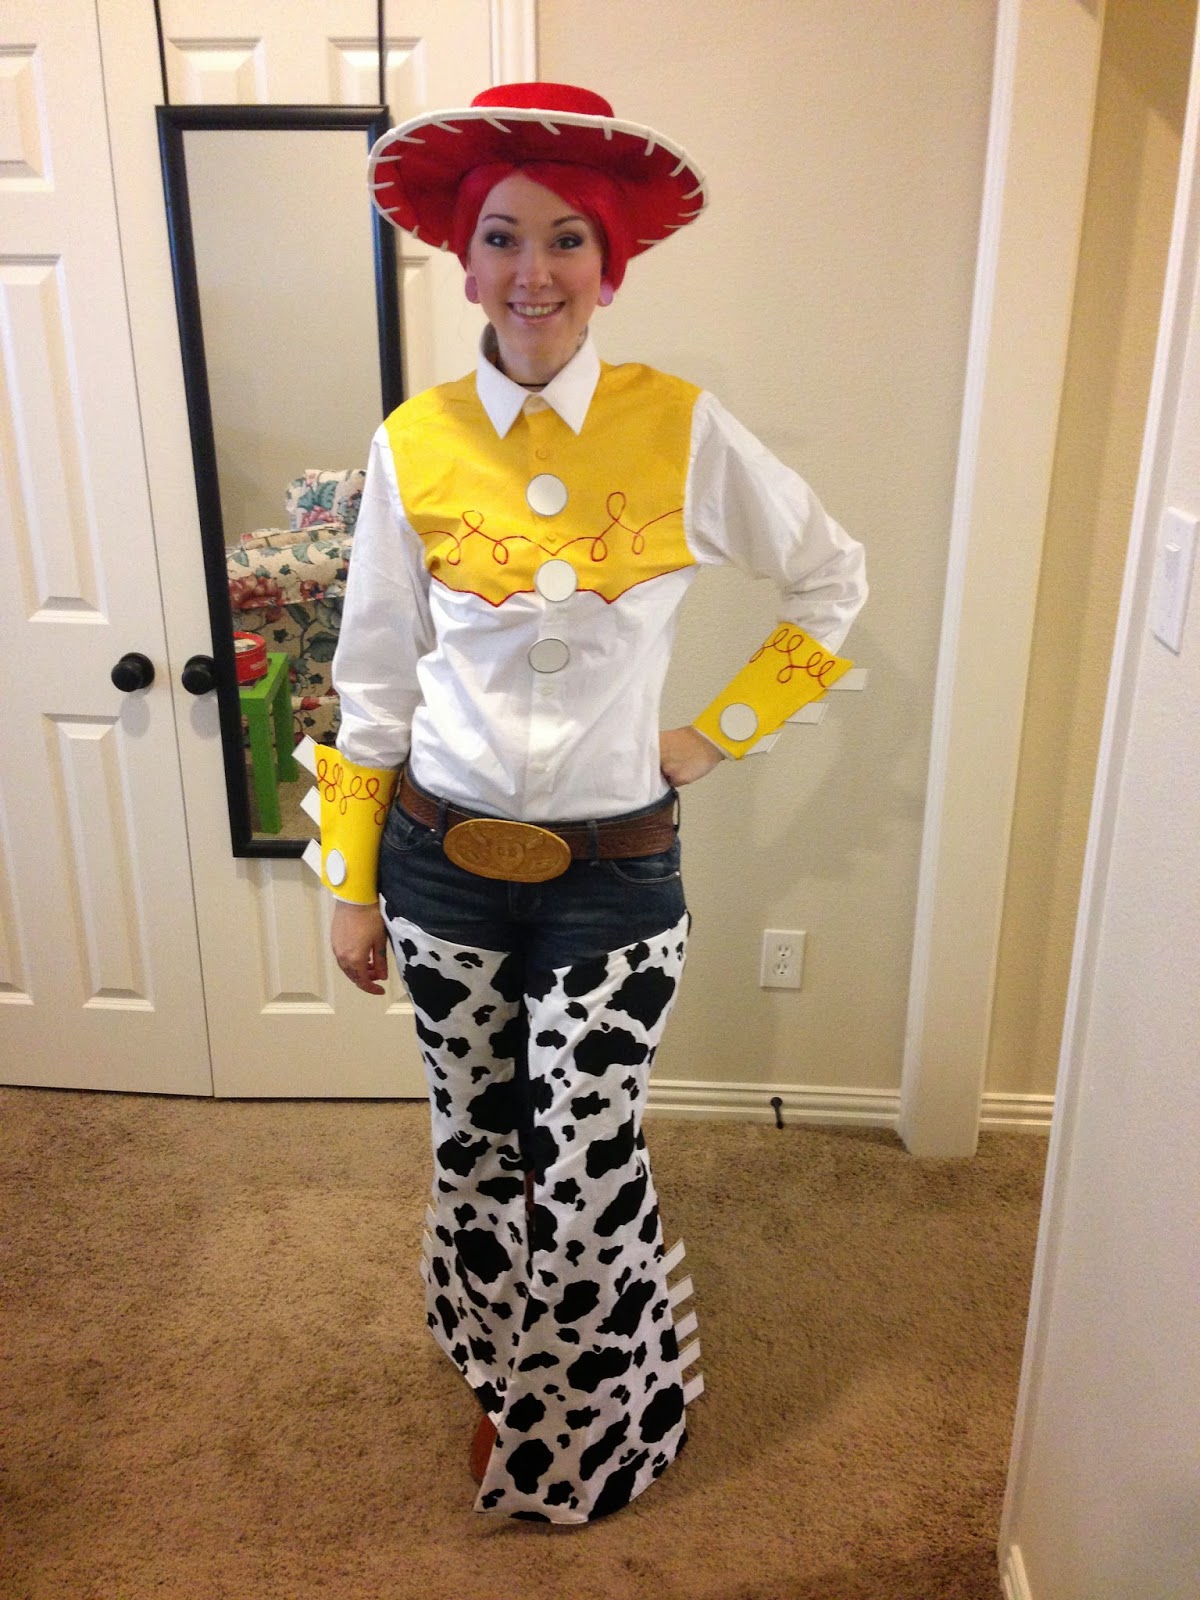
Tutorial: Jessie from Toy Story Cosplay

YEEEEE HAAAAW!!
I’m super excited to share with y’all a root tootin’ fun cosplay! It’s Jessie from Toy Story! I was inspired to make this costume after my friend Garrett mentioned he wanted to build a Buzz Lightyear cosplay. Jessie had been on my dream list, and I think she looks best when paired with other Toy Story characters. So Garrett and I chatted about it and we both got to working on our costumes! I was so happy with how they turned out. Garrett looked amazing as Buzz! Also, huge thank you to Neither Noir for taking this photo of us. If you’d like to view all of my photos from All-Con then check out my Facebook Album.
Now onto the tutorial!

This was the reference photo I used for most of Jessie’s outfit. It is a very fun and easy costume to make. I would definitely recommend it for any first time cosplayers.

First, I painted a white button down shirt with yellow fabric paint on the front and back. I used masking tape to get a clean line at the bottom. Be sure to put cardboard inside your shirt because the paint bleeds. 

Then I used red puff paint to line the button and add the swirlies. I was nervous about getting them symmetrical and wish I had made the swirls bigger.
To make up for the small swirls I decided to add an extra button in the yellow part. Jessie only has two buttons, but after wearing this costume I actually would like to add a fourth.
The cuffs were made out of yellow sheet foam. I cut it to fit my arm and added white sheet foam “tabs” to the side. I outlined the tabs in silver sharpie to give it a shadow.

Next, use puff paint to make more swirls then add buttons to the cuffs. These are the same size as the ones I used on my shirt.

To wear the arm cuffs glue velcro to each side. This way you sandwich it around your arm.

For the belt buckle I cut shapes out of foam similar to Jessie’s for a “longhorn look”
I primed it with Gesso then painted it gold. I attach the buckle with sticky velcro to one of my dad’s brown belts. This way I don’t ruin a belt.

Since I didn’t have any yellow ribbon, I made her bow out of extra yellow foam. I made a pattern first and found a yellow rubber band. 

Then I hot glued the foam to the rubber band.
Jessie has red hair in a long braid so I would recommend this wig by Epic Cosplay Wigs. Mine is actually one from Etsy but it was poorly made so I will not recommend it! I will go into this more when I post about my Ariel cosplay ^.^

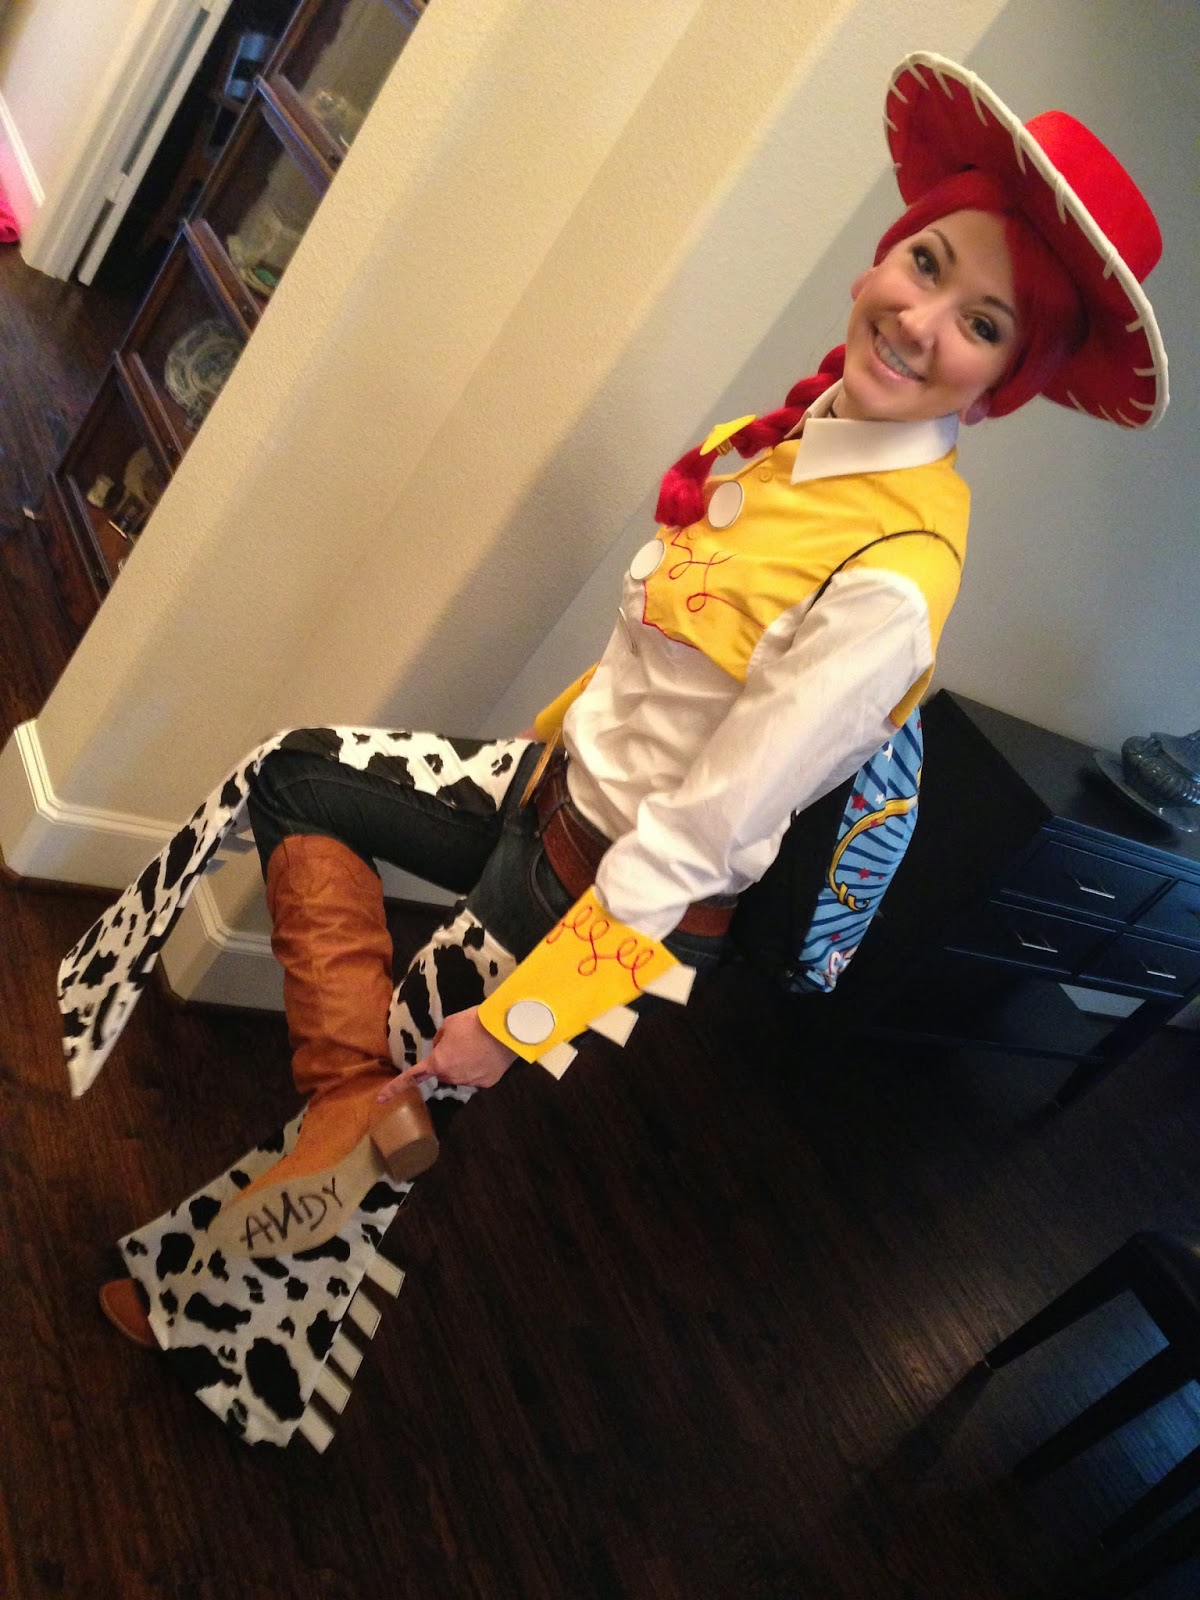
For the chaps, I bought some cow pattern fabric and laid my jeans on top of it. Then I traced my jeans onto the fabric allowing extra for the seam and a slight flare shape. I added little notches so I could line up my pieces easily when I sewed them together. Each chap was kinda like making a large pillow case. This way there was cow fabric on the front and back sides.
Be sure to write ANDY on the bottom of your boot! I just used a black sharpie 🙂
Jessie’s makeup is very fresh and natural. She has really rosy cheeks and big eyes. Try not to put too much eyeliner on the inner corners to make yours look wider. Give yourself a dark brow and add some pink blush to the tip of your nose for an added glow!

I attached my chaps to my jeans with safety pins. I tried using sticky velcro (so I wouldn’t ruin a pair of jeans) but the velcro did not stick! Small crisis the morning of the con lol … But safety pins worked fine. If I wear this again I would buy some cheap jeans at a thrift store or Walmart and actually sew the chaps on. Also, I added tabs to the bottom sides of my chaps by glueing them onto the back.

I found my hat on eBay. It’s a used official Toy Story licensed hat. Sadly I can’t find any others online to link for you! But this tutorial gives good tips on making one.

My boots are from Ami Club Wear. They sell really high quality shoes for great prices! Most of their shoes are great for costumes because they come in a lot of colors. They also ship very quickly.

Here I am with my friend Garrett as Buzz Lightyear at All-Con. He made his costume, too!!! He looked incredible, and I had a blast walking around with him. The Grouches are also my friends Scotty and Courtney. They also made their own costumes!
:+:+:+:
To view all of my photos as Jessie from All-Con check out my Facebook Album!
Who is your favorite character from Toy Story?

26 comments:

  1. You look amazing! (as does Garrett, lol) This looks very easy to do and I love that you include recommendations on how to make it better. Thanks for sharing!

    ReplyDelete

  2. Thanks, as always, for sharing your process with us! I loved watching it all through instagram (I'm really enjoying your Lady Thor pictures right now as well.. can't wait to see a tutorial for it down the road!).

    I just got my own sewing machine for my anniversary and you're really inspiring my to get started with cosplay! I hope to be at your level one day!

    Elyse @ Cuddly as a Cactus

    ReplyDelete

  3. So awesome!!! I love seeing your progress photos of all the costumes you are making!! That wig (color) looks so pretty!

    ReplyDelete

  4. You guys look fantastic! I love your tutorials!
    And, I cannot wait to see your Rule 63/Lady Thor!

    ReplyDelete

  5. My favorite cosplay yet ^_^

    ReplyDelete

  6. You looked so much like Jessie. She is one of my all time fave characters to I was super excited when I saw you were cosplaying her. I love the Andy on your boot.

    ReplyDelete

  7. Such a cool cosplay!! Great job, and thanks for sharing your guide!

    ReplyDelete

  8. How'd you cut the foam on the buckle? I've tried with an exacta knife and it's hideous and uneven.

    ReplyDelete

    Replies

    1. I can't remember exactly, but I usually just use scissors or an X-Acto knife as well. Those little corners can be tough – sometimes those little manicure scissors make it easier!

      Delete

  9. What is the name of the boots you purchased, or do you have a link to them?

    ReplyDelete

    Replies

    1. I bought them from http://www.amiclubwear.com .. I couldn't find the exact ones on the site anymore but they have a ton of options! 🙂

      Delete

  10. How much cow print fabric did you buy to make the chaps? Thanks!

    ReplyDelete

    Replies

    1. I think I bought a yard and a half and had some left over 🙂

      Delete

  11. HELP! I am having trouble with the Chaps, I am not able to make them. What- what material or fabric should I use to make the chaps? Please tell me! Thanks.

    ReplyDelete

    Replies

    1. Hi there! The fabric I used was all cotton from my local Jo Anns fabric store. It already had the cow pattern on it. There's a photo posted showing how I cut and made them. Good luck!

      Delete

    2. oh, thank you. but, um, what did u search, i mean, i am buying it online from jo ann's fabric store. what should i search? thank you for replying!

      Delete

    3. I bought my fabric at the store. So I didn't have to do a search. I just walked around until I found cow print fabric! 🙂 You could try searching "cow print fabric" and see what pops up on Google.

      Delete

  12. HEY, your tutorial was really helpful, but, i can't get the wig in a cheap price from arda wigs or … can you tell me some other "online wig stores" links? thank you 🙂 !

    ReplyDelete

    Replies

    1. I have only purchased from Arda Wigs and Gothic Lolita Wigs online. There's also Epic Cosplay Wigs but all will be around the same price. Which really isn't that expensive when you see how great the quality is. If you want cheap you will get a cheap quality wig unfortunately. You could try eBay.

      Delete

    2. aww! anyway, thank you! 🙂

      Delete

  13. The innocent world of a child is painted with colors and strokes of his fantasy where toys are their best companions. Playing with toys helps him/her in strengthening emotional as well as creative aptitude.

    ReplyDelete

  14. Brilliant! Nice job! Thank you for sharing.

    ReplyDelete

  15. This looks awesome. One comment though that in the movie, the N in Andy on her boot isn't backward

    ReplyDelete

  16. Thanks for the tutorial! Did you wash your shirt after the paint? My shirt is all stiff.

    ReplyDelete

  17. Great tutorial! Thanks for sharing!

    ReplyDelete

  18. Where did you find your buttons?

    ReplyDelete

Note: Only a member of this blog may post a comment.

Related Posts Plugin for WordPress, Blogger...